VS Code Server#
This page is not an activity to follow, but rather a reference guide giving you some initial hints for using the VS Code Server deployed as part of your group's hackathon instance. This application is mainly included for situations where you are not able to SSH to the instance for any reason but you can reach it via HTTPS, however you are free to use it however you see fit.
You will find that in the code-server application you can write code and interact with the topology provided to you using only your web browser. You can access it at https://<my group id>.srexperts.net, where you have to insert your assigned group ID and enter the password documented on the physical paper provided to you to unlock the application.
In the following sections, a few important aspects of VS Code in the browser are highlighted, with the aim of helping you get started with it.
Transient environment
Do note that the environment is not persistent, be sure to save anything you wish to take home with you after the event on your local machine as the code-server and the VM it runs on will not remain available after the event.
1. Landing page and layout#
The first thing you see after unlocking your code-server session is displayed in Fig. 1 below. Most notably, on the left you will find a file explorer, a list of available plugins, and in the top right you find a number of possible layouts for your session.
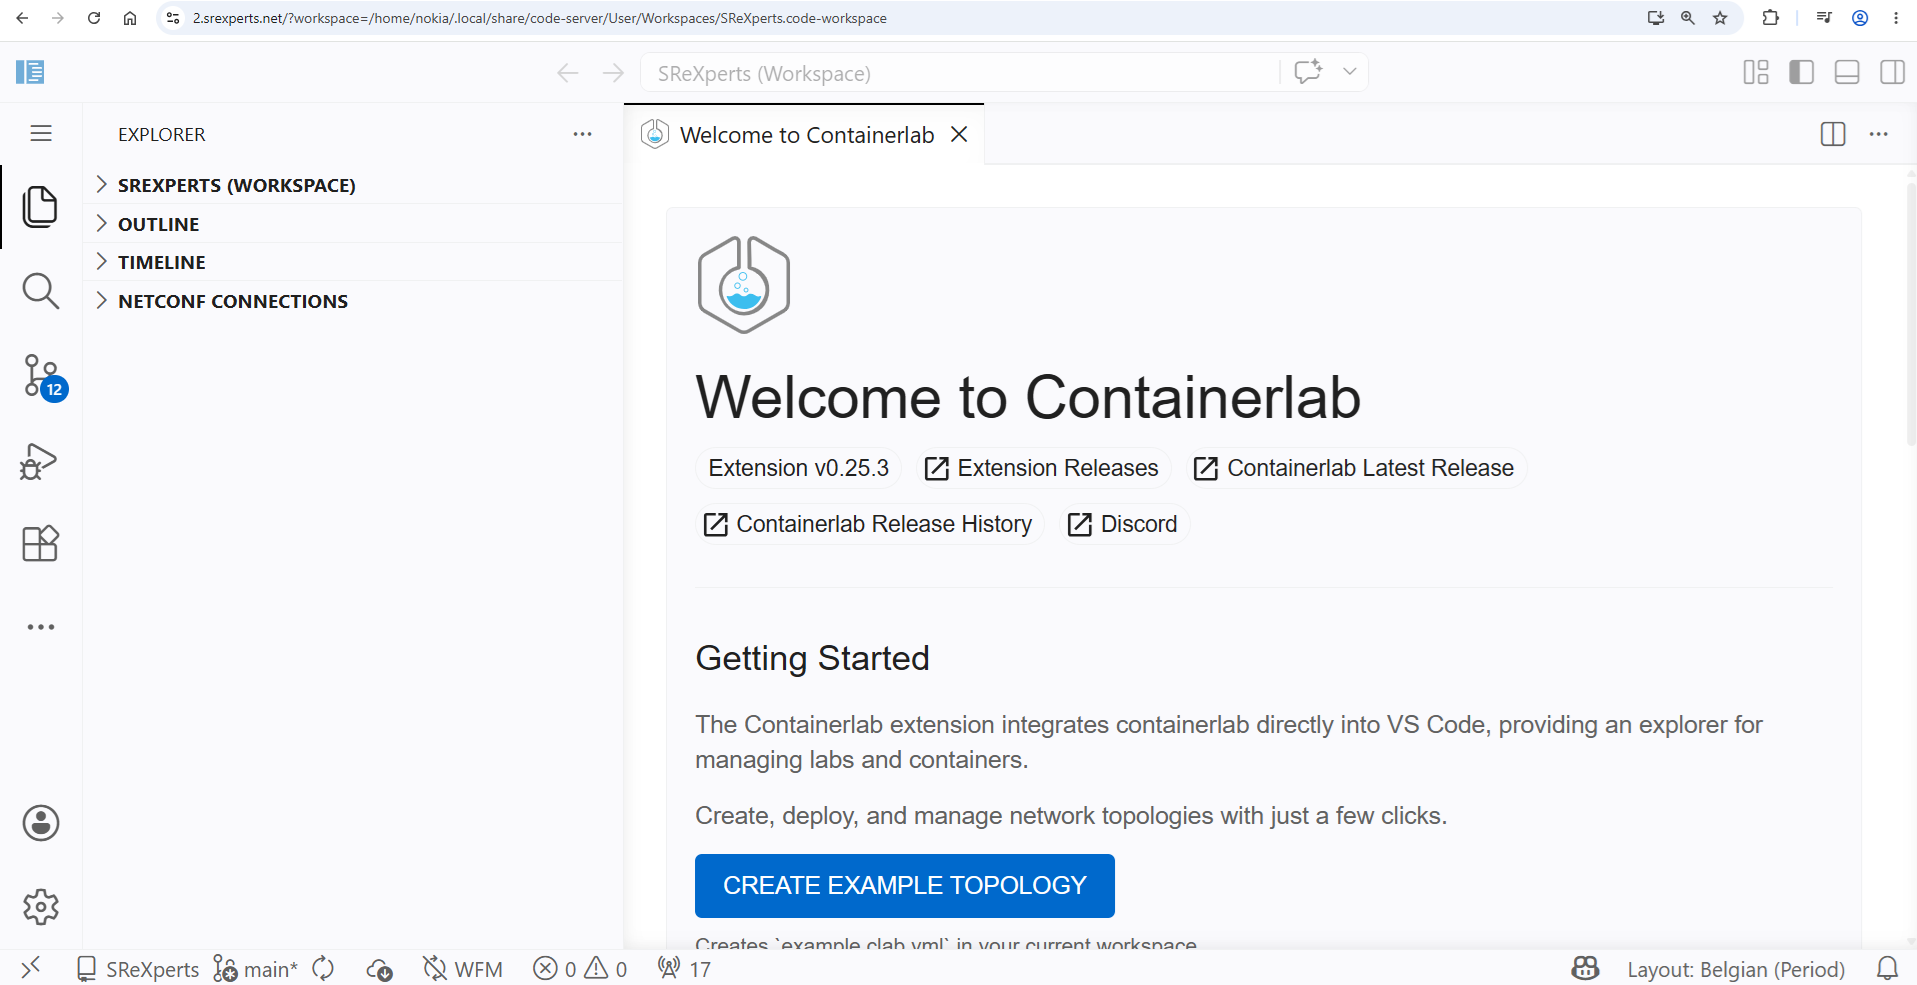
Set up the environment and make sure you can identify the files available in your local directory.
2. Accessing the instance Linux#
The default directory for the code-server is /home/nokia, and the user you are accessing the system as is also nokia. If you were to set up your own VS Code or similar IDE to SSH into your group's hackathon instance you would log in as the same user and land in the same directory. Anything you may need should be available from this directory, including a copy of the hackathon repository. To access your hackathon's shell from the code-server change the layout using the buttons in the top right or use the menu under ☰ > View > Terminal as shown in Fig. 2.
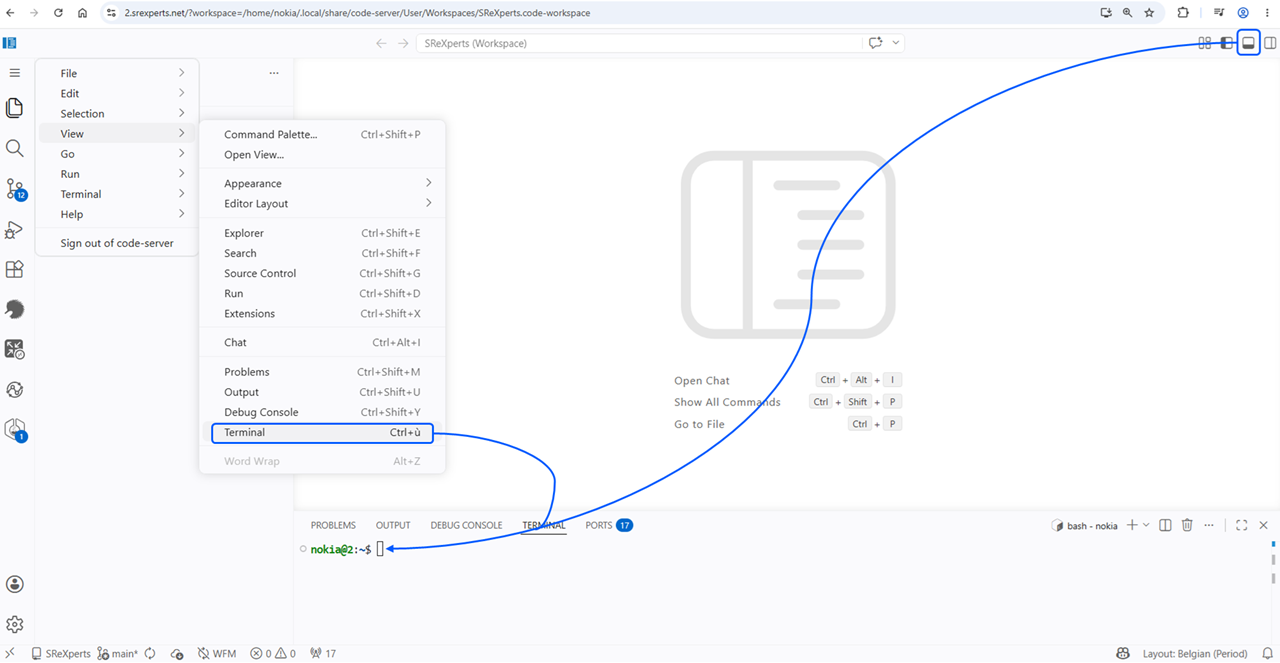
With the terminal, the file explorer, and the option to access other services on your hackathon instance via your web browser, you should have all the tools you may need to go through the hackathon activities.
As an example, if one of the activities requires you to create a directory you could do that via the explorer or via the terminal. Similarly, if you are asked to SSH into your topology's leaf21 node you can use the terminal or the containerlab plugin.
3. Plugins#
Various plugins are used throughout the different activities included in this year's hackathon material, the following plugins are installed on the Code Server:
- EDA
- NETCONF Explorer
- NSP Workflow Manager
- NSP Artifact Administrator
- NSP Intent Manager
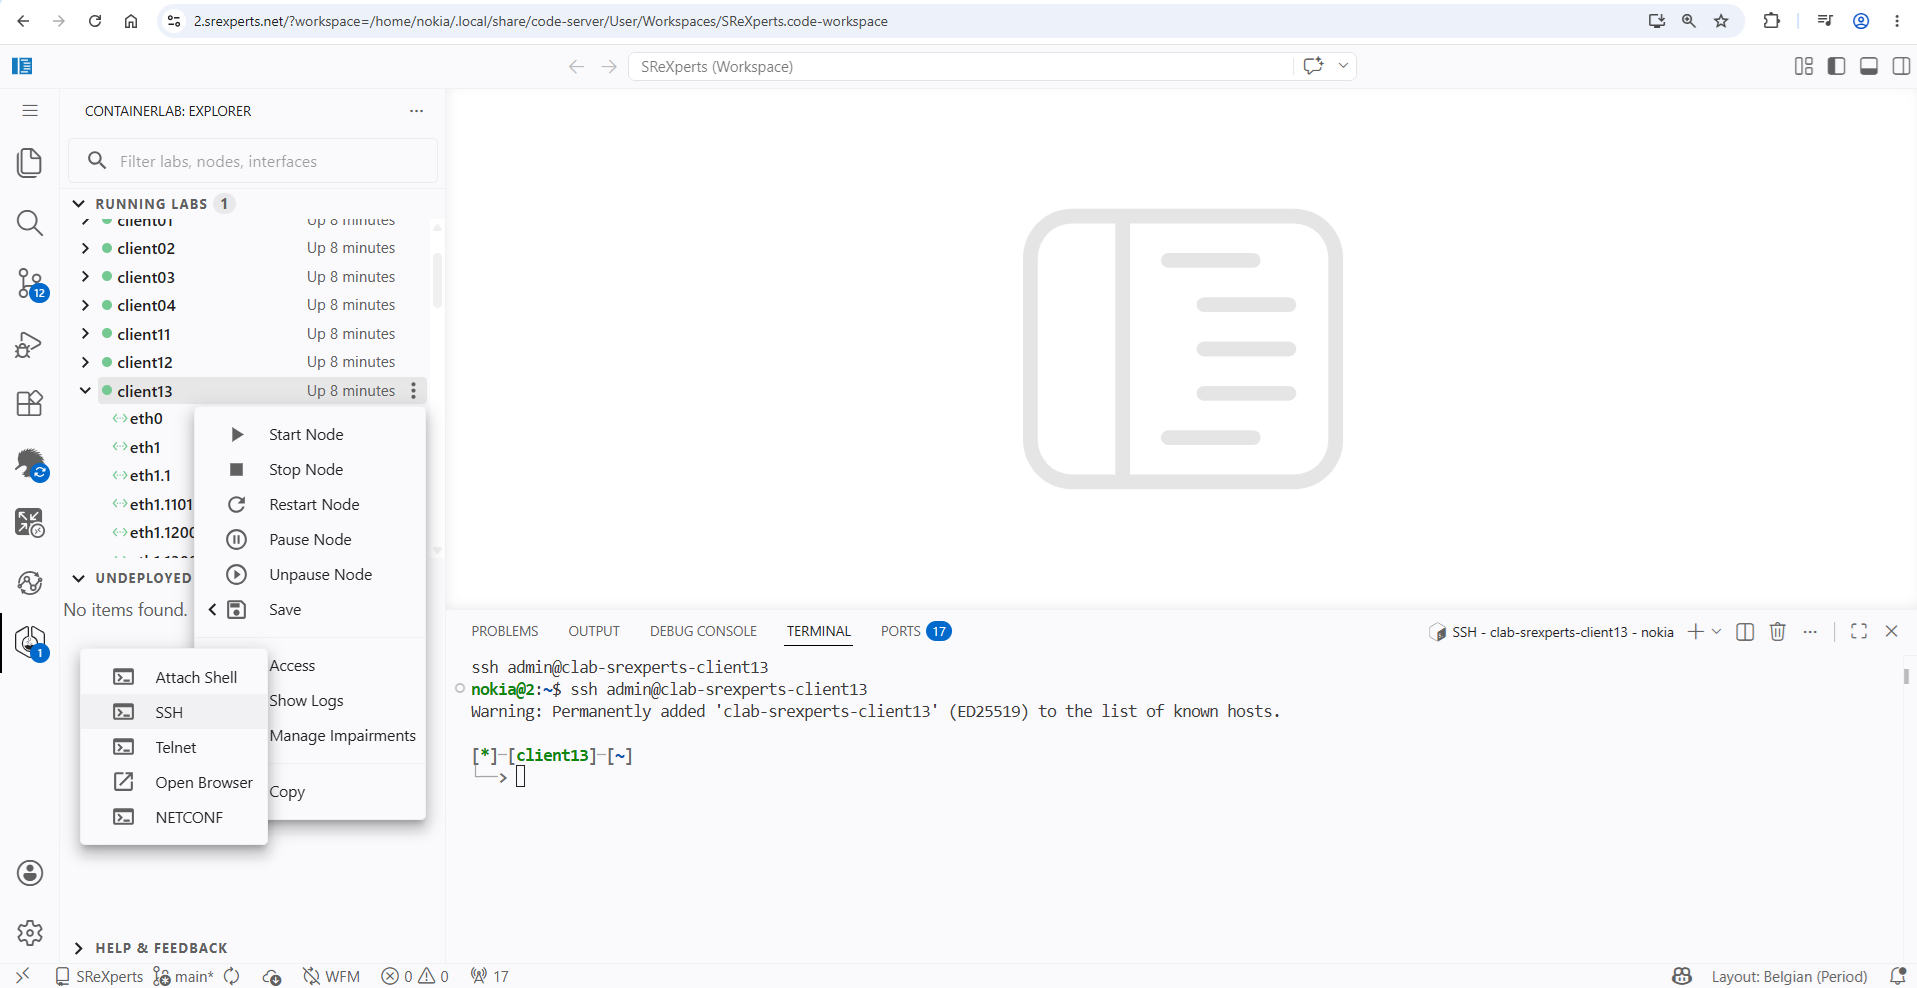
- Containerlab
With the exception of the last element in the list, these plugins and what you are expected to use them for is documented as part of the related activity. The containerlab VS Code extension is documented here as it has many uses. Amongst others, it gives you a large amount of control over your hackathon topology, including traffic captures and a convenient way to log in to the nodes in the network as shown in Fig. 3.