Application Packaging, Distribution, and Execution#
| Activity name | Packaging, Distributing and Installing Applications in EDA |
| Difficulty | Beginner |
| Topology Nodes | leaf11, leaf12, leaf13, spine11, spine12 |
| References | Building EDA applications, Bottom Toolbar app, EDA Store, Custom App Catalog |
One of the trickiest parts of network automation in general is making a script that works on your machine also work on other machines in exactly the same way. The application needs to be packaged, distributed and run in the exact same execution environment to ensure consistency.
Companies were born to solve this problem, and Nokia EDA as an automation platform has a solution for this as well.
In this activity you will learn how to package, distribute and run EDA applications using well-known tools and practices such as container images, registries, and Git repositories.
1. Objective#
The goal of this activity is to take an existing EDA application - Bottom Toolbar app - created by the application team and:
- package it into a hermetic application container image
- push the app image to a container registry of your choice
- publish the application manifest to an application catalog of your choice
- run the application from EDA to verify that it works as expected.
You expect to see the following message in the bottom toolbar of all the switches in your network upon completion of the activity:
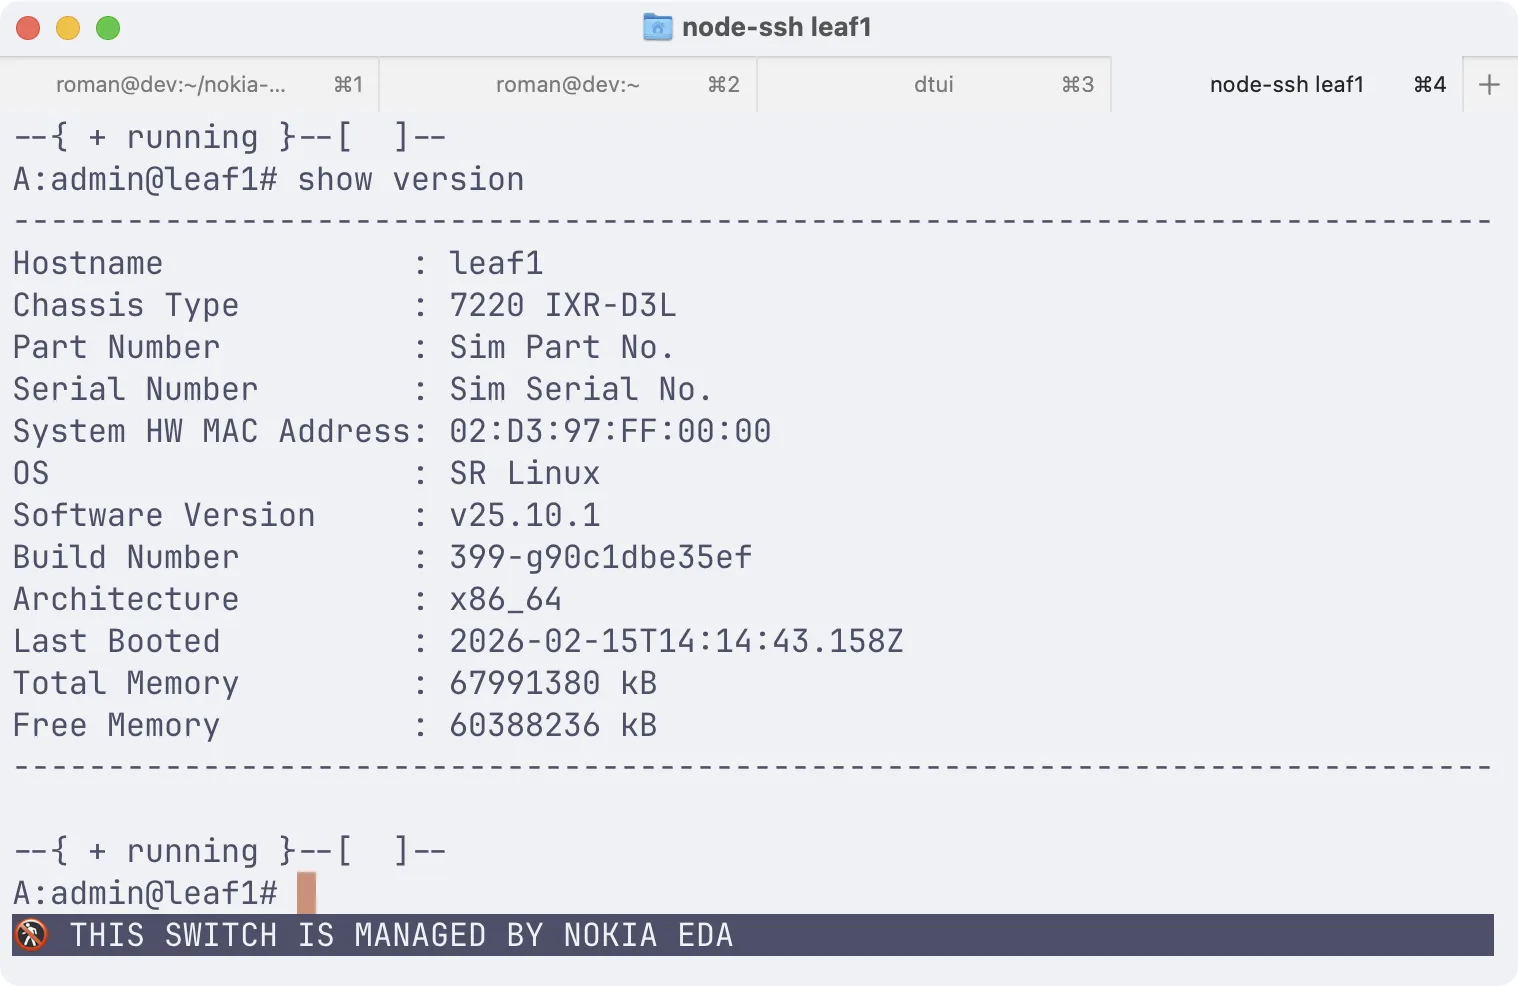
With these steps you will take ownership of the application delivery lifecycle by storing the application in a container registry of your choice, and making it available to your team or organization.
2. Technology explanation#
Nokia EDA leverages well-known and proven tools and technologies to power the application delivery and execution lifecycle. At a high level the following components play a role in the application delivery process:
- Container image: A container image following the OCI spec is the packaging format for all EDA applications. It allows for a hermetic, versioned, and cloud-native application delivery.
- Container registry: A container registry is a storage and distribution system for container images. EDA application container images are pushed to a container registry of the user's choice.
- Application manifest: A YAML file describing the application and its dependencies. It is an EDA-specific file descriptor that helps the tools to understand how to build the container image and which dependencies to pack inside of the image.
- Application catalog: A Git repository of the user's choice where the application manifest is pushed. This is a version-controlled repository that uniquely identifies which applications are available in the catalog.
- EDA Store: A subsystem in EDA that provides a web interface to browse the configured application catalogs and install applications from them. It resolves the application manifest and downloads the container image from the container registry.
The decentralized nature of the application delivery process allows for a flexible, sovereign, and self-hosted application delivery solution.
3. Tasks#
3.1 Clone the application repository#
The application team has created the git repository - bottom-toolbar-app - where they pushed a simple EDA application that configures the bottom toolbar of the SR Linux switch with a precautionary message:
You want to publish this application to your own container registry and your own application catalog to ensure that it is available to your team or organization.
The first task is to clone the application repository to your assigned VM. When cloned, check out the srx2026 tag to get the application code validated for this activity.
Verify the tag
To verify that the tag has been checked out correctly, run:
If you don't see the srx2026 tag, checkout the tag again:
3.2 Ensure edabuilder is installed#
Great solutions require great tools. The EDA team has developed the edabuilder tool that assists in every step of the application lifecycle: from developing to shipping and debugging.
edabuilder is already installed on your VM. To verify that it is installed, run:
3.3 Set up a container registry#
As mentioned in the Technology explanation section, EDA applications are packaged into a cloud-native package format - OCI container images. These images are pushed to a container registry that supports the OCI spec. Luckily, almost all major container registries do support the OCI images: Harbor, Quay, Docker Hub, ghcr.io, JFrog Artifactory, to name a few.
Your task is to choose the container registry that you want to use to push the application container image to. Note down the URL of the container registry you chose.
Now you need to tell edabuilder how to authenticate with this container registry so that it can push the application container image to it. This is done by running:
For example, if you chose GitHub Container Registry - ghcr.io - and your organization/name is someuser, you would run:
The tool will prompt you for your username and password/token.
GitHub Container Registry requires a personal access token to authenticate. You can create a token here.
If you provided the correct credentials, edabuilder will print a success message and you can proceed to the next task.
$ edabuilder login registry ghcr.io/someuser
Username: someuser
Password:

Successfully added login for ghcr.io/someuser
3.4 Set up a Catalog#
In order for EDA to discover and install the application, the application manifest needs to be pushed to a Git repository accessible to EDA. In EDA we call these repositories - application catalogs.
Choose a Git service that you are familiar with (e.g. GitHub, GitLab) and create a new repository with a name of your choice.
In order to push the application manifest to the Git repository, you need to provide authentication credentials to the edabuilder tool. Similarly, run:
For example, if you chose GitHub and your repository URL is https://github.com/someuser/some-repo.git, you would run:
The tool will prompt you for your Git username and password/token.
GitHub requires a personal access token to authenticate. You can create a token here.
Upon successful authentication, edabuilder will print a success message and you can proceed to the next task.
$ edabuilder login git https://github.com/someuser/some-repo.git
Username: someuser
Password:

Successfully added login for https://github.com/someuser/some-repo.git
EDA can work with a private Git repository, but for simplicity we advise you to make the repository public, and you can always make it private later as an extra challenge.
3.4.1 Git author information#
Since edabuilder is going to create a new commit in the Git repository, it needs to know who the author of the commit is. You can set the author information by running:
git config --global user.name "Your Name"
git config --global user.email "[email protected]"
You have successfully authenticated with the Git repository and added the git author information. You are now ready to configure the application manifest to use the container registry and the Git repository you chose.
3.5 Set application image URL#
If you take a look at the application repository you cloned, you will find a directory called bottom_toolbar that contains the application source code and its manifest.
In this manifest file the app team has defined the application image URL that they used during the testing phase. You need to update the image URL in the manifest to point to the container registry you chose in the previous task.
Save the edited manifest file and proceed to the next task.
3.6 Release your application#
You reached an important milestone in the application delivery process. You have prepared the application catalog, logged in to the container registry and changed the application image URL in the manifest to point to the container registry of your choice. Everything is in place to release the application.
The edabuilder release command will do everything for you:
- It is important to keep the git schema (https) in the URL.
A successful release will result in the following output:
Publishing to branch 'main'
No app version given, using the manifest image tag as app version:
Staging `bottom-toolbar.eda.labs` at version `v0.1.0`
Successfully published Apps
Successfully Released Apps
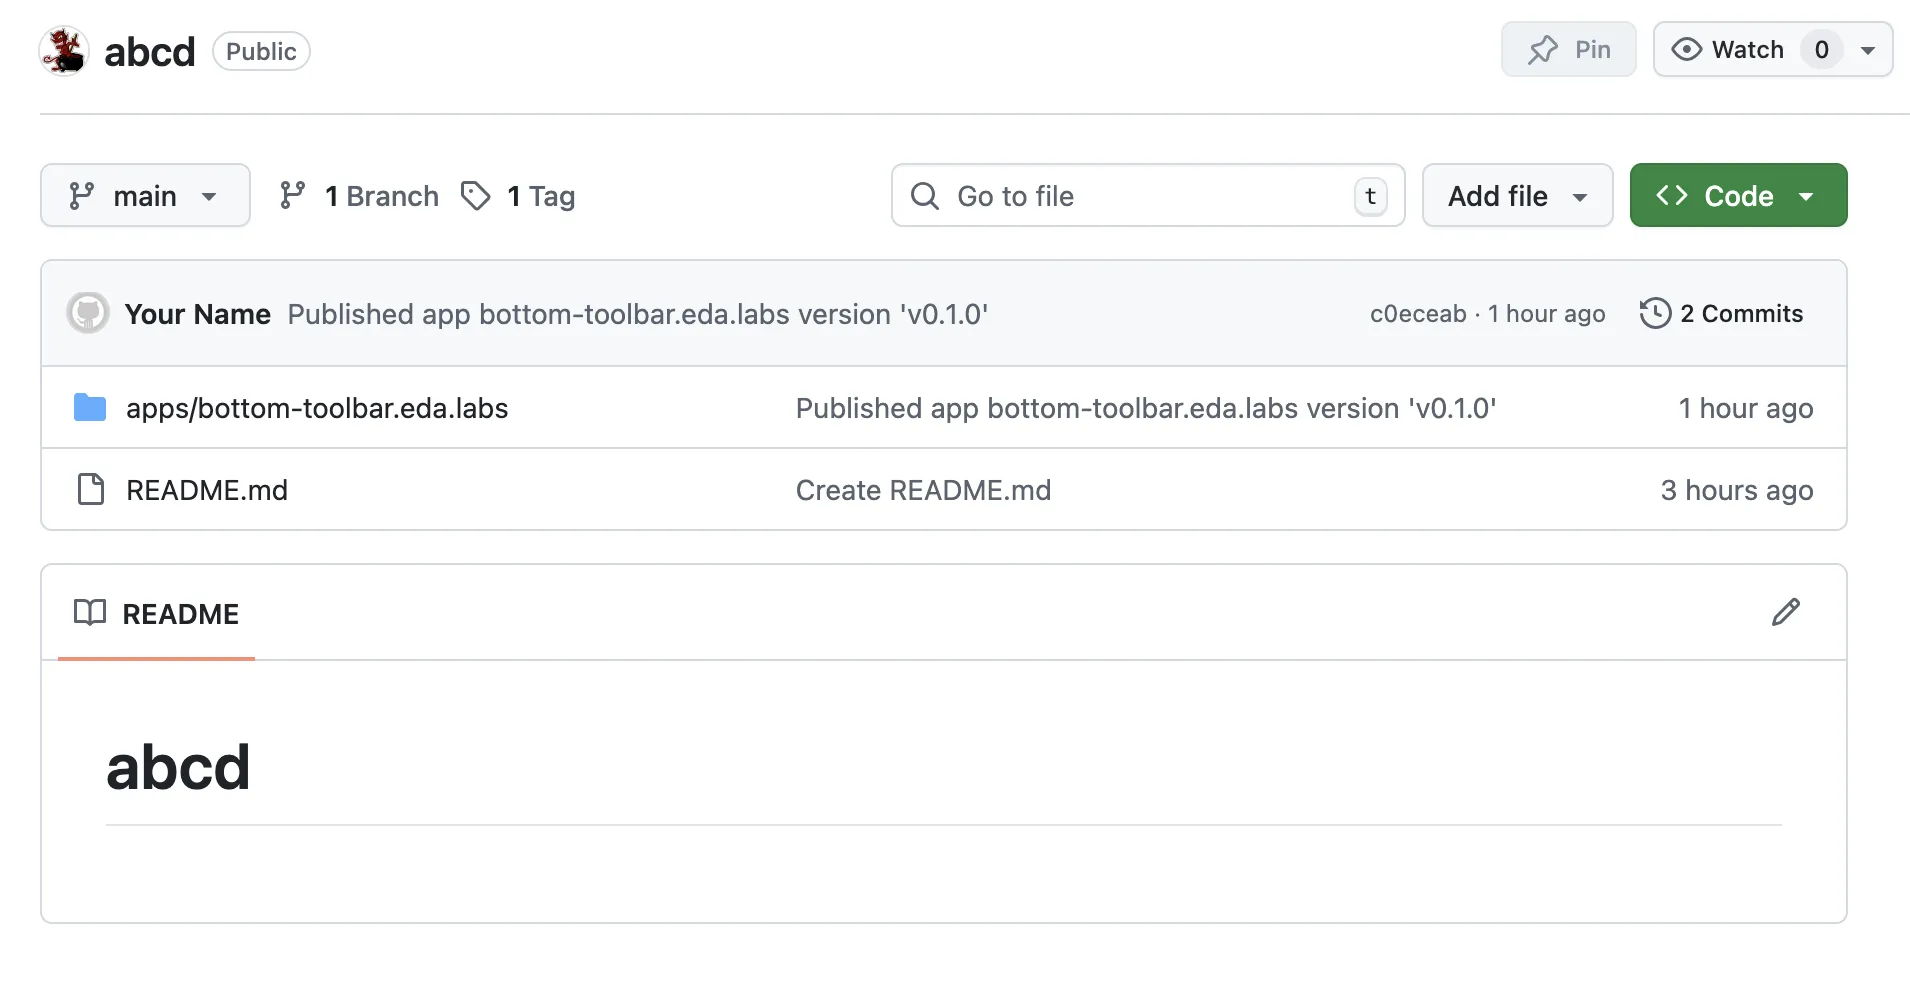
If you open up the repository in your browser, you will see a new tag and commit in the history related to the published application:
Container image permissions
While EDA can perfectly work with private container registries by providing the registry credentials, for this activity it is easier to make the published container image public.
For example, the images pushed to GitHub Container Registry are private by default; you will need to find the image in your registry and make it public.
3.7 Configure Catalog in EDA#
Now that your application is published, you need to tell EDA where to look for your new application. This is done by configuring the EDA Store with a Catalog resource pointing to the Git repository you chose.
While everything can be done via the CLI, API or SDKs, one of the easiest ways to configure the catalog is to use the EDA Store UI.
In the EDA UI, click the panel dropdown and select the System Administration panel:

Selecting the System Administration panel will open up the EDA Store UI automatically where you will see applications that EDA discovered based on the catalogs configured in the system. By default, there is one Catalog that EDA comes with - Nokia Built-in Catalog - the catalog that contains applications that Nokia provides out of the box.
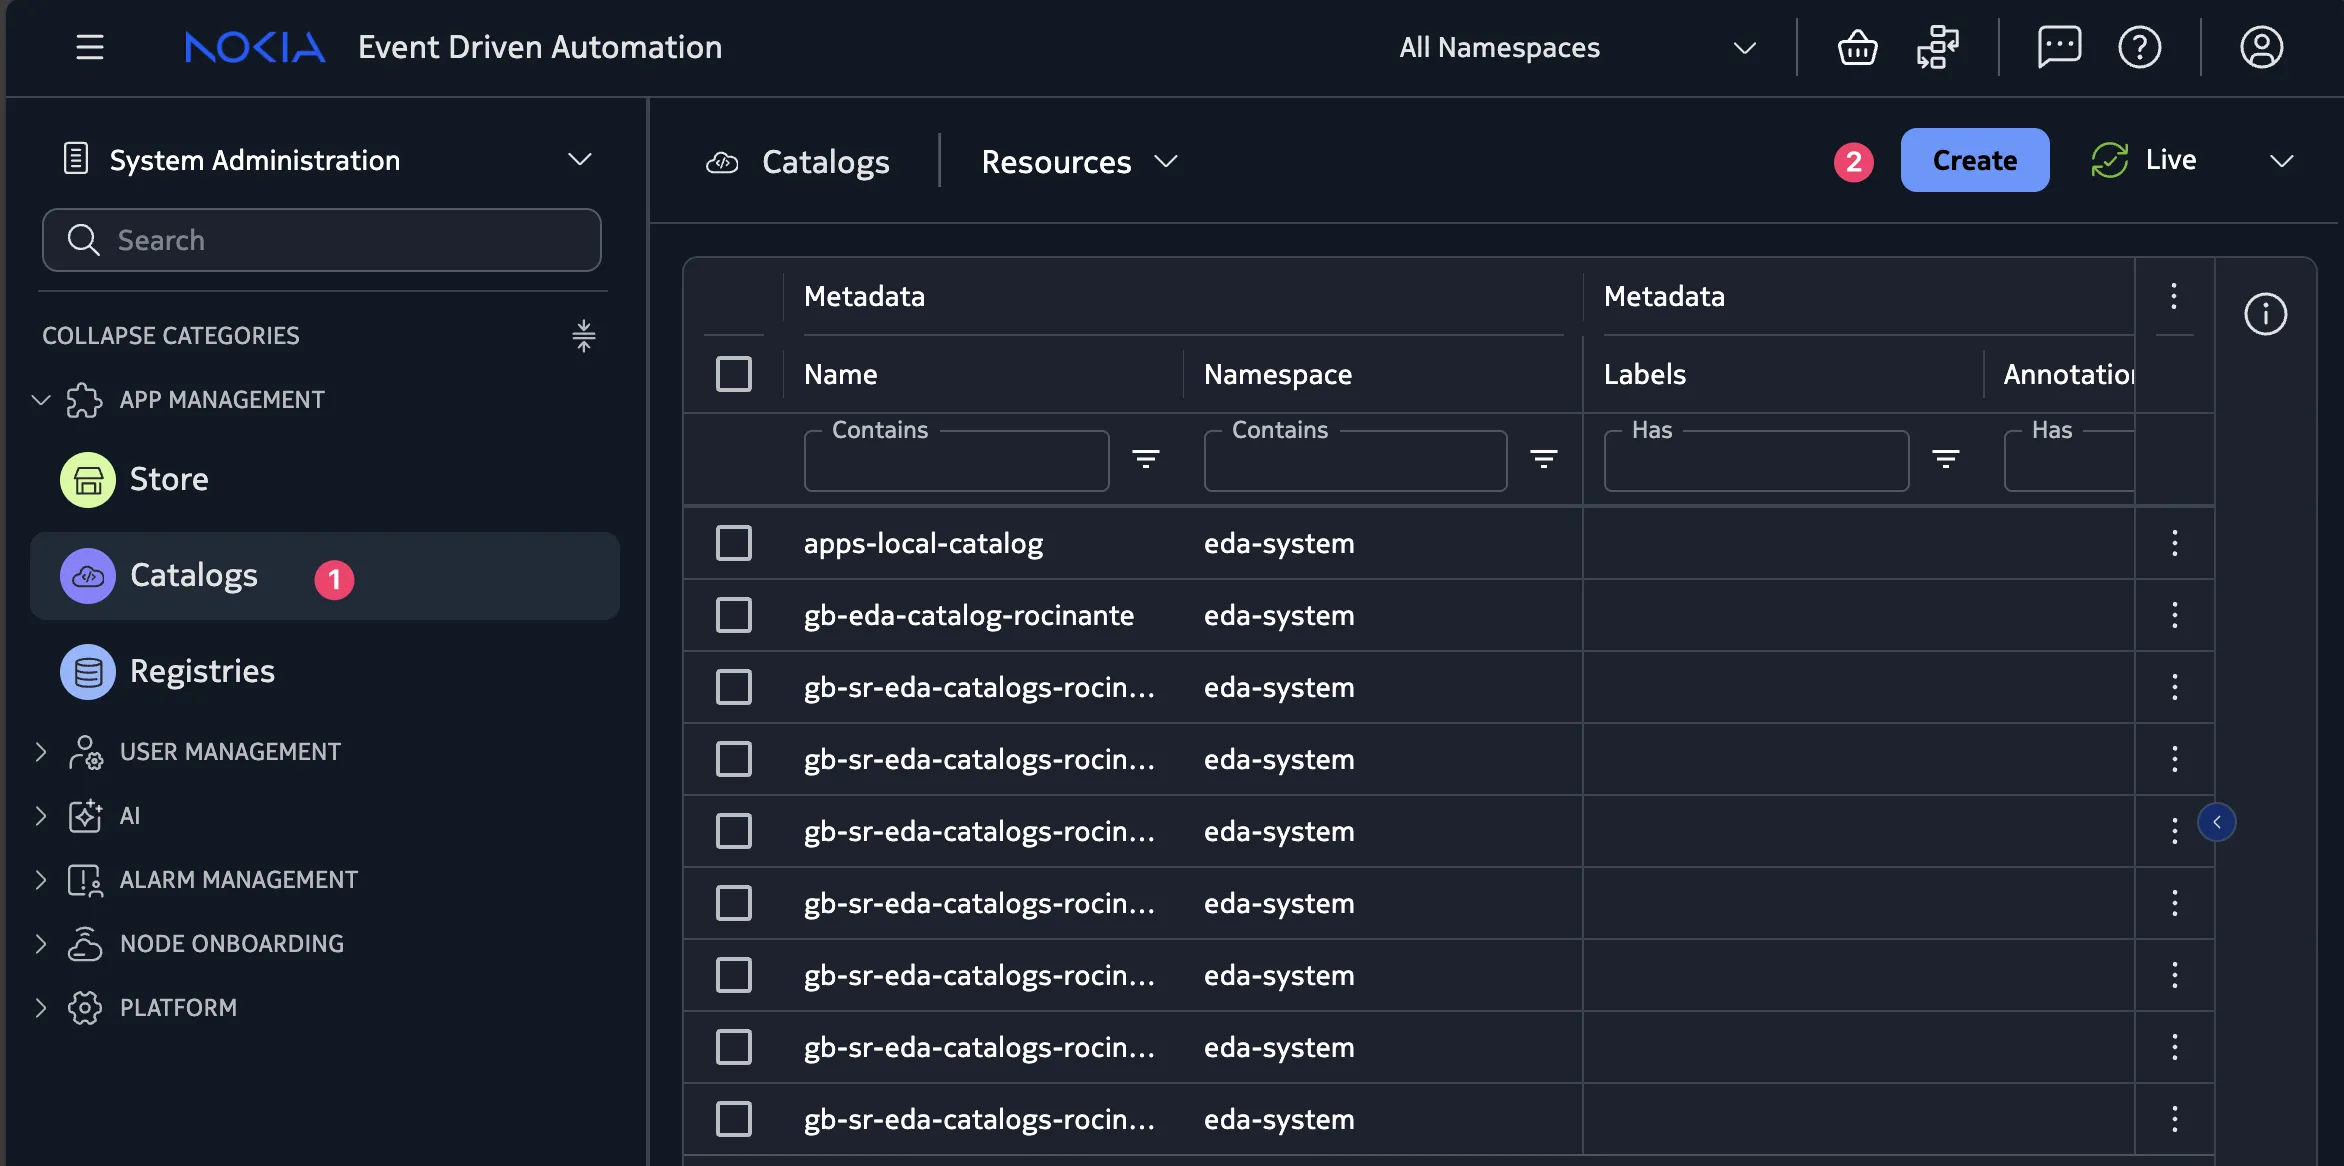
Naturally, your application is not yet in the list, because it is not provided by Nokia—it is your own app that your company or organization is building. In order to make your application discoverable by the EDA Store, you add a new Catalog resource to the system.
To add a new Catalog resource, select the Catalogs item in the left sidebar and click the Create button to open the resource editor form.
In the resource editor form, fill in the details of your catalog. What do you think you should fill in there?
Once you have filled in the details, click the Commit button in the edit form to have your new catalog resource created.
3.8 Install the application#
If your Catalog is reachable by EDA, it should be able to find applications published in it and display them in the EDA Store UI. Go back to the EDA Store and select your newly added catalog to display only the applications in it.
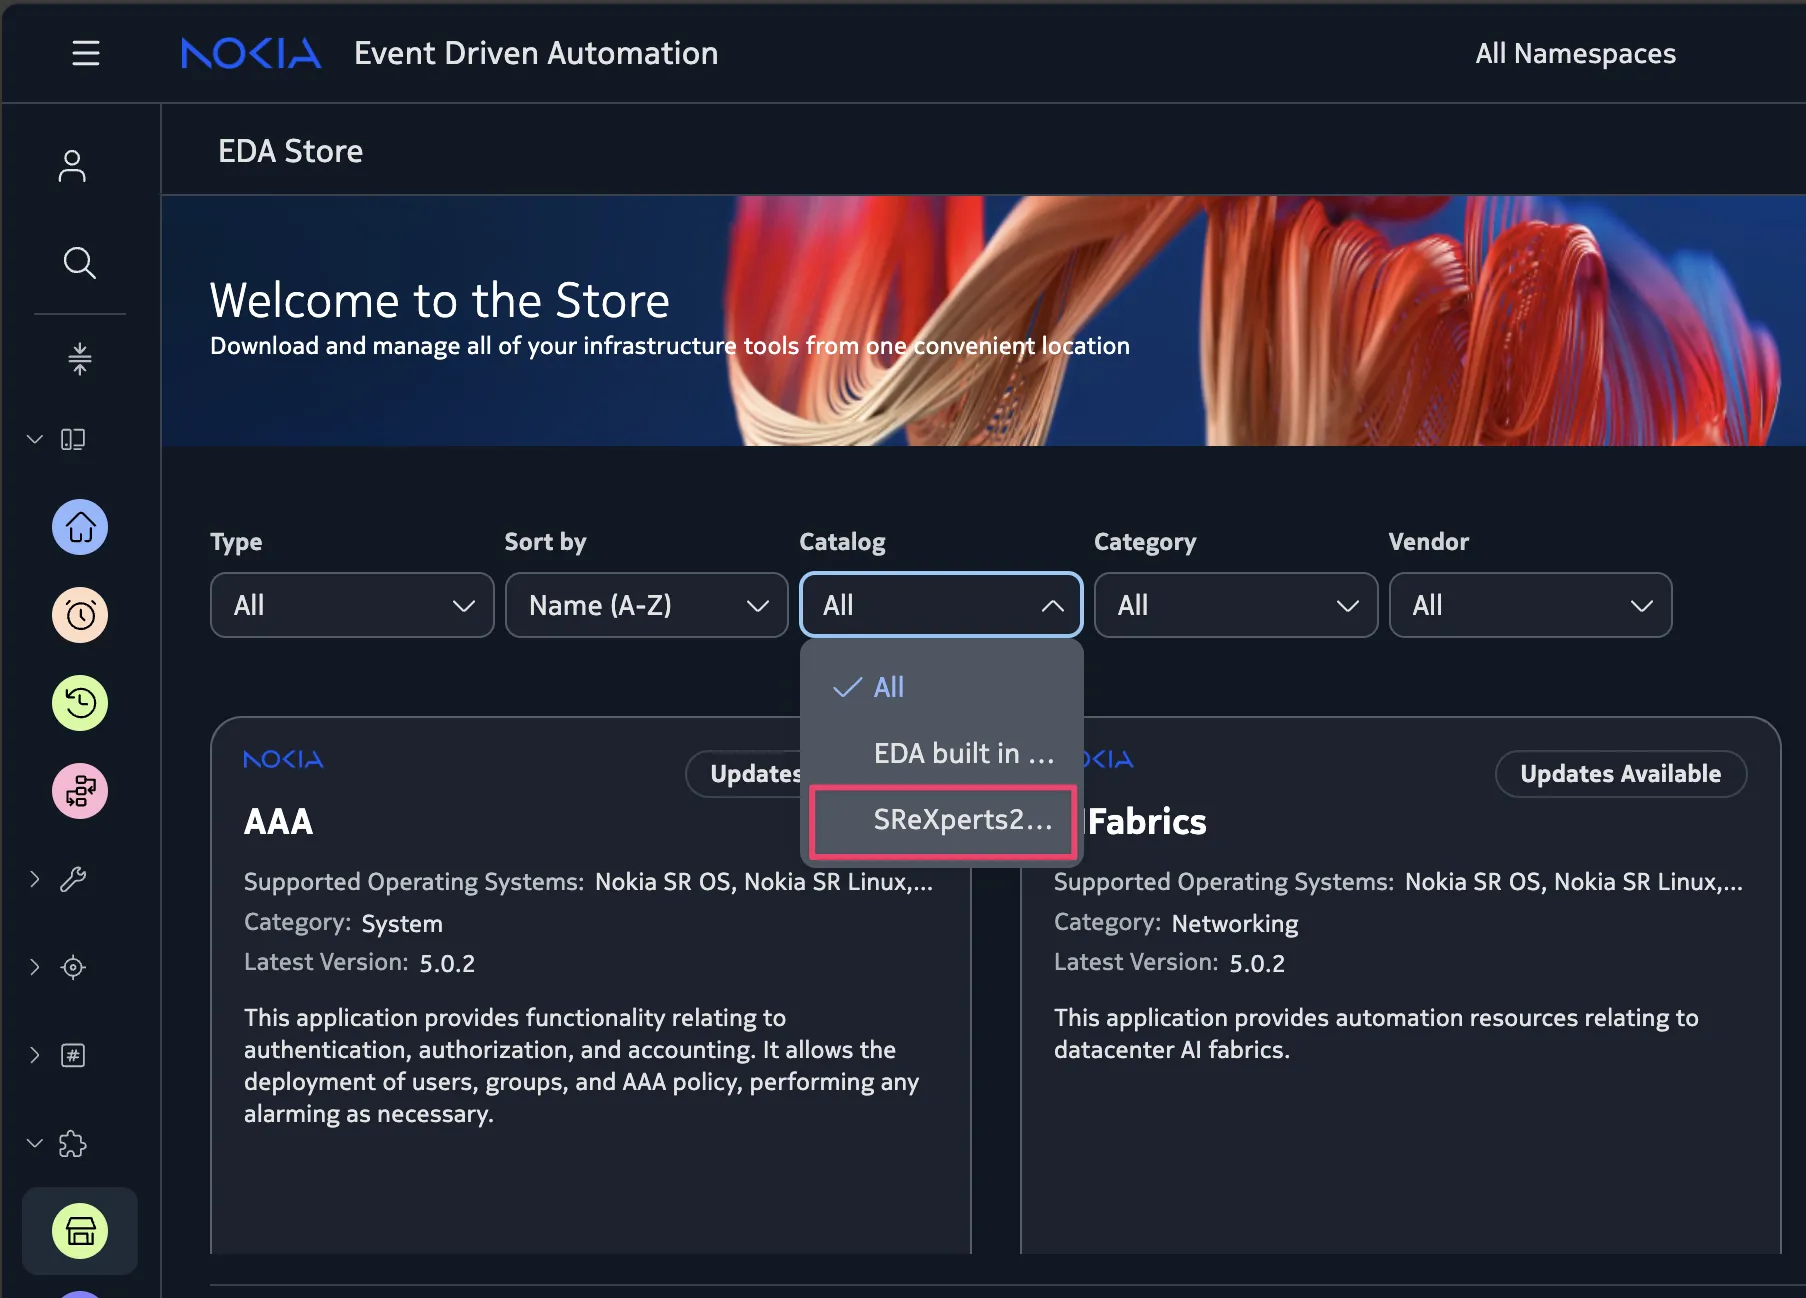
Selecting the custom catalog will filter the list to only show the applications in it. Find the "Bottom Toolbar" application you released and click Install.
EDA will read the application manifest and download the container image from the container registry referenced in the manifest. It will then unpack the container image and install the application onto the platform, thus extending the functionality of the platform.
This plugin-like architecture gives operators the ultimate flexibility to extend the platform with their own applications, while keeping the core platform secure and stable.
3.9 Try the application#
Once the application is installed, you can try it out. Switch back to the "Main" panel and search for the Bottom Toolbar application:
Click the Create button to create a new Bottom Toolbar resource and fill in your fancy toolbar message. You can enjoy the full range of UTF-8 characters, including emojis 🎉! So go ahead and complete this activity by engraving your message on the switch's CLI. Connect to the switch's shell to see it in effect—it is a spectacular sight.
4. Summary and review#
In this activity you have learned how to:
- package a 3rd party application into a container image
- release the application via a container registry with its manifest pushed to a Catalog backed by a Git repository
- configure the custom Catalog in EDA Store to make the application discoverable
- install the application on the platform and try it out
There is a lot of magic that EDA casts behind the scenes to fulfill the promise of a flexible, decentralized, and self-hosted application delivery pipeline. By allowing operators to own the application delivery lifecycle, EDA empowers them to extend the platform with their own applications, while keeping the core platform stable.