Intent App Development#
| Short Description | Developing custom application for the EDA platform using EDABuilder framework |
| Difficulty | Advanced |
| Tools used | EDABuilder, SR Linux Event-Handler operational groups script and Python |
| Topology Nodes | leaf11, leaf12 and leaf13 |
| References | Developing apps on EDA SR Linux Event-Handler |
Right out of the box Nokia EDA comes with a rich set of automation capabilities:
- A collection of network-focused applications to declaratively manage your Data Center.
- A large list of run-to-completion workflows for operational tasks dear to every network operator.
- A number of integrations with external systems and providers such as ServiceNow, GitLab, Prometheus, etc.
Despite the fact that this ever-growing list of automation features is provided within the core platform, every EDA user can develop their own apps on top of the EDA framework. Why would one need it, you may ask? Good question, and here are the top three reasons EDA users might want to create their own apps:
- Adapt existing applications to the user's needs.
EDA provides applications developed by Nokia that should suit a large number of users, however, some operators might prefer to adapt the apps provided by Nokia to their specific needs. For example, reducing the number of application inputs, or changing the app behavior to better integrate with the existing network designs. -
Create new apps for missing configuration coverage
The list of applications that is shipped with EDA is growing with each release, still there are a few configuration regions that are not covered by the apps provided out of the box. The operators might want to create a custom app that bridges the configuration coverage gap by writing an app.This is what this activity will focus on.
-
Create new integrations
Next to the applications that declaratively manage configuration on the network devices exists another class of applications that we call "Integration apps". These apps provide integration with external systems like NetBox, ServiceNow, GitHub, etc.
As you can imagine, there are hundreds of potential integrations on the market and we don't have them all in the product, but we give our users the necessary tools and APIs to write such apps themselves.This activity will not go into the details on how to write integration apps.
1. Prerequisites#
Apart from having some familiarity with EDA and SR Linux, you should have a basic knowledge of Python in order to develop the EDA application presented in this activity.
Warning
This activity is not for the faint of heart and might be challenging to accomplish in the given time frame. However, the exercise will be available throughout the whole year, so you can try it at home after reading the EDA Docs on the matter and practicing it with your own Try EDA instance.
1.1 Choose your dev environment#
Before you start developing the app you have to choose where you want the development to happen:
- On the remote VM using VS Code Remote-SSH - the easiest way to get started.
- On the remote VM using the Code Server (VS Code in the browser) by pointing your browser to the
https://<ID>.srexperts.netURL, where<ID>is the ID of the group you are assigned to. - On your local laptop - you will need to install some tools.
- On the remote VM using terminal editors (vim, etc) - only if you know what you are doing ;)
Based on your preference, read the instructions in one of the tabs below.
The easiest way to approach this rather advanced activity is to bypass the dev environment setup by leveraging the VM provided to you. The VM has all the necessary tools installed and you can start developing the app straight away.
However, to enjoy the development process we advise you to configure your IDE (VS Code, JetBrains, Cursor, etc) to use the provided VM via the Remote SSH.
The Code Server is a web-based IDE that allows you to develop the app directly in your browser. It is the next best thing after using the local IDE with the remote SSH plugin.
The downsides are that you will have to develop essentially in the browser, which might not be as comfortable as using a local IDE. But all the tools are there, so the start time is similar to using the local IDE with the remote SSH plugin.
If you want to develop the app on your own laptop you will have to install the necessary tools and interpreters as explained in the edabuilder prerequisites section.
Connect with SSH to the allocated VM and use vim or install the editor of your choice.
2. Objective#
As was mentioned in the introduction of this activity, Nokia EDA ships with a solid list of applications designed to declaratively manage the configuration and state in your network as well as providing integrations with external systems. However, the list of applications is growing release to release and some features that you would want to automate with Nokia EDA might not be available yet. In scenarios like this, you might write an app yourself to deliver the not-yet-available feature set.
How cool is that? No need to wait for a vendor to close the feature gap you need!
For this activity we picked an Event-Handler feature of SR Linux that has no Nokia-provided application in the EDA platform, offering you a chance to see how extensible the platform is and how easy it is to write an application.
Your objectives will be to develop an EDA application that declaratively configures the Event-Handler subsystem on SR Linux and reports its state in a streaming fashion. To achieve this objective you will have to perform the following steps:
- Create the Event-Handler resource by defining its API: Before writing any code, you need to create a schema that specifies the exact inputs a user can provide. This API defines the configuration blueprint for your application.
- Create the app project with
edabuilder: Instead of building a directory structure from scratch, you will use theedabuilderCLI. This tool automatically scaffolds the required folders, creates your top-level project files, and sets up templates for your custom resources, saving you from writing repetitive boilerplate. - Identify the Event-Handler node-level model to know what needs to be configured by the app: Because Nokia SR Linux uses a model-driven (YANG-based) architecture, you need to map your application's user intent to the exact configuration tree of the device. In this step, you will explore the SR Linux data model to find the specific path that your script must manipulate.
- Create the Config intent script that handles the provisioning part of the application: This is where the core logic lives. You will write a Python script that takes the user inputs (from Step 1) and translates them into the actual device-level configuration (from Step 3). This script hooks into EDA's transactional ConfigEngine to push the desired state safely to the network.
- Create the State intent script that handles the presentation of the Event-Handler state to a user: Automation works best when it includes visibility. This second Python script queries the network device to confirm that the Event-Handler is running correctly. It streams telemetry and operational state data back to the EDA platform, allowing users to monitor their network in real time.
- Deploy the application on EDA: Once your scripts and manifests are complete, it's time to bring the application to life. You will package your project and load it onto the EDA cluster. This makes EDA aware of your new app and allows it to process the new Event-Handler intents.
- Configure the Event-Handler using the app you wrote and see it in action: You will instantiate your custom intent on the SR Linux nodes to verify that the configuration is properly pushed to them and that its state is accurately reflected back in the EDA UI.
By completing these objectives you will get an application that extends EDA with custom functionality, while being natively integrated with the platform.
3. Technology explanation#
3.1 Intent apps#
During the primer session you learned that one of the core application types within Nokia EDA is Intent apps. Intents are applications running natively inside the EDA's platform and translating the declarative resource definition into the actual node-level configurations on the network devices. Intent apps also process and present the live streaming telemetry data from the network devices back to the EDA platform.
For example, when you create an Interface resource in EDA to provision a physical interface on your managed devices, the Interface intent app is executed. It calculates the necessary configuration changes, pushes them to the target nodes, and then continuously represents the actual state of that created resource back to the user.
These applications are written in Python and utilize the EDA Intent API to seamlessly perform their provisioning, validation, and telemetry functions within the platform.
3.2 The Resource#
Every application run in EDA is triggered by the creation, modification, or removal of a Resource. The Resource is the primary abstraction that a user interacts with to perform configuration and state management in EDA. A resource is strictly defined by its metadata (such as its name and namespace), its specification (the inputs provided by the user), and the accompanying state (the real-world status reported back by the network).
If you have worked with Kubernetes, you will immediately recognize this declarative structure. EDA resources were heavily inspired by the Kubernetes Resource Model (KRM), bringing cloud-native paradigms directly to network automation.
For example, when a user wants to define a physical interface, the resulting Interface resource in YAML format looks like this:
apiVersion: interfaces.eda.nokia.com/v1
kind: Interface
metadata:
  labels:
    eda.nokia.com/role: interSwitch
    role: hackathon-infra
  name: leaf11-ethernet-1-31
  namespace: eda
spec:
  description: inter-switch link to spine11
  enabled: true
  encapType: 'Null'
  ethernet:
    stormControl:
      enabled: false
  lldp: true
  members:
    - enabled: true
      interface: ethernet-1-31
      lacpPortPriority: 32768
      node: g2-leaf11
  mtu: 9198
  type: Interface
When a user needs to create or modify an interface in EDA, they do so by creating or modifying the Interface resource. The platform records this resource, which in turn triggers the accompanying intent application to run and perform its function.
3.3 Config and State intents#
EDA applications manage configuration and state on the network devices by splitting the automation logic into two distinct, highly specialized types of Python scripts (aka intents):
- Config intents:
These scripts handle the "desired state" of the managed resource. When a user creates or modifies a resource in the EDA UI or API (like the YAML example above), the config intent receives these inputs and translates the abstracted data into low-level resources or direct node-level configuration snippets. Nokia EDA platform then ensures these outputs are reliably transacted on the target nodes, featuring built-in syntactic validation and auto-rollback on any error conditions. - State intents:
These scripts provide the "actual state" of the managed resource. Automation is incomplete without visibility, so the job of a state intent is to continuously collect operational data from the network devices and to map this real-world telemetry back to the resource fields of the application. This feeds directly into the EDA platform, updating the status of the abstracted resource so the user always has an accurate, real-time view of the network.
During this activity, you will be tasked with developing both the Config intent script and the State intent script.
Your config intent will take care of translating the user's abstracted inputs to configure the Event-Handler on the target SR Linux devices.
Your state intent will query the devices and present (in a streaming fashion) the active state of that Event-Handler instance back into the resource's status fields within the EDA UI.
3.4 Edabuilder#
Writing all the necessary API definitions, manifests, and boilerplate code to create a cloud-native application from scratch can be tedious. To streamline the development process, Nokia provides the edabuilder CLI.
This tool acts as the primary scaffolding mechanism for EDA applications. By running simple commands like edabuilder init and edabuilder create app, it automatically generates the required directory structures, sets up the Go-based API definitions (CRDs), initializes the Python environment for your intents, and even assists with building, deploying, and publishing the finalized application to the EDA Store.
4. Tasks#
4.1 Create a new App project#
The journey starts with creating a project directory where our application is going to be developed. A project is a top-level container that can hold one or more apps and their shared utilities.
The instructions below assume you are developing on the provided VM.
We will use the edabuilder CLI tool - a scaffolding utility provided by Nokia - to set up everything correctly from the start, so we don't have to learn the project structure by trial and error.
Connect to the provided VM using the available credentials and start leveraging edabuilder.
Note
edabuilder is already installed in all VM instances.
To initialize a new EDA project which will hold our app, use the init command. From the root of your user's home directory execute:
# example:
# edabuilder init --vendor <your_name> <your_project_directory_name>
edabuilder init --vendor "srx" event-handler-app
where:
-
your_name: a DNS-compliant string identifying the application vendor. Fill in your name, your handle, or your company's name. This becomes part of the metadata for every app created inside the project. -
your_project_directory_name: another free-form string. It only affects what directoryedabuilderwill create for your project on disk; it does not become part of any resource name.
Based on the dev setup preference you selected on Prerequisites, read the instructions in one of the tabs below.
When connecting with Remote-SSH to the VM, choose the directory that you have created in the command above to ensure that your IDE opens up the project directory created by edabuilder.
In order to deploy your app into the EDA platform you will need to copy your project directory to the VM and execute the edabuilder deploy command from the VM. In real life you won't do this, as your dev machine will have the necessary connection information to deploy the app directly.
Example rsync command to copy the project over
where:
-
-a: Archive mode (preserves permissions, times, and symbolic links). -
-v: Verbose (shows you what is being copied). -
-z: Compresses file data during the transfer. -
-P: Shows progress during transfer and keeps partially transferred files if interrupted.
Then proceed to the next section to init the project inventory.
Create a folder ~/eh-app within your allocated VM and start developing the app there using vim or installing the editor of your choice.
4.1.1 Analyze the project structure#
Let's explore the contents of the top-level directory that edabuilder scaffolded for us. Understanding this structure is key to navigating your new application - and knowing what not to touch is just as important as knowing what to edit.
Project layout
If you list the contents of a newly created project folder called event-handler-app using a command like tree, you will see a layout similar to this:
tree event-handler-app/

event-handler-app/
├── Makefile
├── PROJECT
├── common
│   ├── alarm_constants.py
│   ├── bfd.py
│   ├── component.py
│   ├── constants.py
│   ├── db_topology
│   │   ├── __init__.py
│   │   ├── constants.py
│   │   ├── element.py
│   │   ├── element_metadata.py
│   │   └── overlay_state.py
│   ├── health.py
│   ├── metadata.py
│   ├── overlay_constants.py
│   ├── test_component.py
│   └── test_metadata.py
├── core
│   └── pysrc
│       ├── __init__.py
│       ├── alarm.py
│       ├── alarmdefinition.py
│       ├── alarmpolicy.py
│       ├── allocation_common.py
│       ├── branch.py
│       ├── clusterprovider.py
│       ├── clusterrole.py
│       ├── constants.py
│       ├── convert_unstructured.py
│       ├── designer.py
│       ├── deviation.py
│       ├── deviationaction.py
│       ├── edgeinterface.py
│       ├── engineconfig.py
│       ├── globalconfig.py
│       ├── httpproxy.py
│       ├── indexallocationpool.py
│       ├── ipallocationpool.py
│       ├── ipinsubnetallocationpool.py
│       ├── license.py
│       ├── logoutput.py
│       ├── manifest.py
│       ├── namespace.py
│       ├── nodeconfig.py
│       ├── nodeprofile.py
│       ├── nodesecurityprofile.py
│       ├── nodeuser.py
│       ├── pipelinedefinition.py
│       ├── role.py
│       ├── satelliteprofile.py
│       ├── sharedipservice.py
│       ├── simlink.py
│       ├── simnode.py
│       ├── simtopology.py
│       ├── subnetallocationpool.py
│       ├── targetnode.py
│       ├── topobreakout.py
│       ├── topolink.py
│       ├── topology.py
│       ├── topology_state_common.py
│       ├── toponode.py
│       ├── transaction.py
│       ├── transactionpipeline.py
│       ├── transactionresult.py
│       ├── udpproxy.py
│       ├── virtualcluster.py
│       ├── waitforinput.py
│       ├── workflow.py
│       └── workflowdefinition.py
├── go.work
├── pyproject.toml
├── ruff.toml
├── test
│   ├── common_testing.py
│   ├── config_pp.py
│   ├── eda_common.py
│   ├── eda_config.py
│   ├── eda_state.py
│   └── test_common_testing.py
└── utils
    ├── alarms.py
    ├── copy.py
    ├── exceptions.py
    ├── interface.py
    ├── ip.py
    ├── log.py
    ├── namespaces.py
    ├── node_utils.py
    ├── paths.py
    ├── paths2.py
    ├── schema.py
    ├── state.py
    ├── test_copy.py
    ├── test_exceptions.py
    ├── test_interface.py
    ├── test_ip.py
    ├── test_node_utils.py
    ├── test_paths.py
    ├── test_paths2.py
    ├── test_schema.py
    ├── test_timestamp.py
    ├── test_version.py
    ├── timestamp.py
    └── version.py
A walkthrough of the relevant parts:
-
common/: Shared Python functions, data structures and constants that any app inside this project can import. Theconstants.pyfile in particular is interesting because it defines platform tags likePLATFORM_EDA,PLATFORM_SRL,PLATFORM_SROS, etc - your scripts will use these to dispatch to the right vendor handler. You should generally avoid modifying files in this folder manually, as they are managed by the EDA framework and may be overwritten by futureedabuilderupdates. -
core/pysrc/: Auto-generated Python models for EDA's own core resources (nodes, namespaces, alarm definitions, transactions, etc.). Your scripts can import these to interact with the broader EDA ecosystem (e.g. listing topology nodes, raising alarms). Read-only - don't edit these files manually. -
utils/: A toolbox of utility functions for everyday tasks: parsing IP addresses, formatting interface speeds, normalizing timestamps, parsing JSON-paths, reading/writing the state DB, and much more. The two files you will reach for most often areutils/log.py(which exposeslog_msg, the standard logger for intents) andutils/schema.py(which holds schema constants for many built-in EDA resources, likeCONFIG_SCHEMAfor theNodeConfigCRD that we will use to push device-level configuration). Likecommon/, this is read-only. -
test/: Boilerplate for unit-testing your scripts. The framework provides stubs foreda_common,eda_configandeda_stateso you can run logic in isolation without a real EDA cluster. You will add your own test files here. -
PROJECT: A core metadata file containing the global configuration your project was initialized with. It tracks vital parameters like thebuilderVersion(ensuring CLI compatibility), the targetregistrywhere container images are pushed, and thevendorname you provided earlier. -
go.work: Even though you write your app logic in Python, the application's API is defined in Go structures (just like in Kubernetes), and thus your app toolchain will execute some Go tools to build the necessary artifacts. You won't have to write Go yourself, besides defining the API specification -edabuilderwill do the rest for you. -
pyproject.toml: Modern Python project definition files.pyproject.tomldeclares your project's metadata and dependencies; -
ruff.toml: Configuresruff- a fast Python linter and formatter that helps catch errors before deployment. -
.envand.envrc: Environment variables that help editors (like VS Code) and shells likedirenvautomatically resolve local Python imports and activate your virtual environment when youcdinto the directory. These files are not needed for the EDA platform, but they are useful for local development.
A note on Python runtime
Although you write your scripts in Python, EDA executes them on MicroPython, a lightweight Python implementation chosen for its faster cold-start times and lower memory footprint - a good fit for an event-driven platform that may invoke handlers many times per second.
The practical implication: assume the standard library is reduced. Common modules like json, os (limited), and sys work, but anything more exotic (importlib, inspect, dataclasses, typing at runtime, etc.) may not be available. When in doubt, stick to primitives like dicts, lists, getattr/hasattr, and try/except.
4.1.2 Create a Python virtual environment#
When programming in Python, it's good practice to work inside a "virtual environment". A virtual environment isolates your project's dependencies from the global system, ensuring that the specific versions of the EDA libraries you are using do not conflict with other Python tools on your machine. Note this venv is for your editor's autocompletion and linting - the actual application will run on EDA platform.
There are many ways to create a Python virtual environment, so pick the one you are more comfortable with. Since uv - a lightning-fast Python package and project manager - is already pre-installed on the provided VM, you can set up your environment effortlessly.
Navigate into your newly created project directory and synchronize the dependencies using uv:
The above command reads your pyproject.toml file, automatically creates a hidden .venv directory (your isolated virtual environment), and downloads all the necessary Python libraries required to write your intent scripts.
Note
Add the following to the pyproject.toml file to ensure that the virtual environment loads the local imports that come with the scaffolded project:
4.1.3 Ensure git author config#
Nokia EDA relies fundamentally on local git repositories - it uses git under the hood to version, package and track changes to your application manifests during the build process. Every app deployment command ends up creating a commit in a local repo, which is then pushed to EDA's internal registry.
When you initialized the project, edabuilder automatically created a local git repository. However, git refuses to create commits unless it knows who is making them. Therefore, you must ensure your git author information is configured on the machine.
Run the following commands, replacing the placeholders with your actual name and email:
If you have used git on your system before, the author information is likely already there and this step can be skipped.
4.2 Create the App#
A project can hold multiple apps, and each app encapsulates one piece of automation logic - its CRDs, its scripts, its docs, and its UI definitions. Now that the project skeleton exists, let's create our first (and only) app inside it. We will use edabuilder create app for this:
Want to use multiple words in <your_app_name>?
The words must be separated by - (e.g., event-handler-app), as this name will be used to generate Kubernetes-compliant resource names. Internally edabuilder will create a Python package using the same name with underscores instead of hyphens (e.g. event_handler_app), because hyphens are not valid in Python module names.
This command creates a new dedicated directory inside our project. The directory has the following structure:
App directory layout
If you list the contents of a newly created app folder called <your_app_name> using a command like tree, you will see a layout similar to this:
tree event_handler


event_handler #(1)!
├── alarms
│   └── pysrc
├── api
│   └── v1alpha1
│       ├── groupversion_info.go
│       └── pysrc
│           ├── __init__.py
│           └── constants.py
├── build
├── crds
├── docs
│   ├── CHANGELOG.md
│   ├── LICENSE.md
│   ├── README.md
│   ├── SUPPORT.md
│   ├── index.md
│   ├── media
│   ├── resources
│   ├── snippets
│   └── vars.yaml
├── examples
├── go.mod
├── i18n
├── intents
├── manifest.yaml
├── openapiv3
├── rbac
├── test
└── ui
- Note, that edabuilder replaces the
-with_in the directory name to make it a valid Python package name.
A walkthrough of the most relevant parts:
-
manifest.yaml: The most important file in the app. It is the entry point that EDA uses to register your app: it declares which Custom Resource Definitions (CRDs) your app exposes, which Python scripts handle which kinds, the supported network OS versions, and other metadata.edabuilderupdates this file automatically as you scaffold new resources and intents - but you may need to read it (and occasionally tweak it) to understand the wiring. -
api/: The "contract" of your app. Houses Go files (.go) that define the Spec and Status of every resource your app introduces. Insideapi/v1alpha1/pysrc/you will find auto-generated Python classes that mirror the Go definitions - these are what your intent scripts import to manipulate user input safely with type hints. You only ever edit Go files manually here; the Python files are regenerated byedabuilder generate. -
crds/: Auto-generated Kubernetes CRD manifests in YAML, derived from your Go API definitions. EDA installs these into the cluster onedabuilder deploy. Read-only. -
openapiv3/: Auto-generated OpenAPI v3 schemas for your resources. EDA's UI uses these to render the input forms when users click "Create" on your resource. Also read-only. -
intents/: Where your Python scripts live. This is the directory you will spend most of your time in. It will contain one subfolder per resource (e.g.eventhandler/for the config side,eventhandlerstate/for the state side). -
docs/: Documentation that gets bundled with your app. TheREADME.md,index.mdandCHANGELOG.mdhere are rendered directly inside the EDA web interface in your app's "About" page. Worth filling in - your future users will appreciate it. -
ui/: For optional custom UI extensions like dashboards or specialized input forms. EDA renders a sensible default UI from the OpenAPI schema, so you can ignore this folder unless you have specific UX needs. -
alarms/: For alarm definitions if your app raises alarms based on telemetry conditions. Out of scope for this activity. -
workflows/(created on demand): For operational, run-to-completion tasks that users can launch from the UI (think "ping this node", "upgrade this fabric", etc.). Different from intents in that they do not continuously reconcile - they run once and report a result. -
rbac/,i18n/,examples/,build/,test/: Less commonly used. RBAC for fine-grained access control, i18n for translations, examples for sample YAMLs to show users, build/ for build artifacts, test/ for app-specific test fixtures.
For this activity, we will primarily focus on api/, intents/ and manifest.yaml.
4.3 Create a Resource#
Every EDA application revolves around one or more Resource objects. A Resource is the user-facing object: it represents the abstraction that the user creates, and/or modifies through the UI, or any of the EDA's APIs. Behind the scenes, EDA detects a change made to a Resource and runs the associated intent script to handle the change.
For example, when you create a new Interface resource, EDA runs the associated intent script that takes the user-provided parameters from the resource object and runs the script with them to configure the interface on the network device.
For our app we need a resource that represents one Event-Handler instance to be deployed across some target nodes. To scaffold the API specification and the boilerplate Python intents, run the following command:
# --app <your_app_dir_name> --name <your_resource_name>
edabuilder create resource --app event_handler --name EventHandler
Warning
<your_resource_name> must be in PascalCase (e.g. EventHandler, not event-handler or event_handler). Kubernetes Kind names follow this convention strictly.
The command above did some heavy lifting behind the scenes. It generated API definition files in Go (.go) inside <your_app_name>/api/v1alpha1. The resource API directory has the following structure:
Resource API layout
edabuilder create resource --app event_handler --name EventHandler


tree event_handler/api/v1alpha1/

event_handler/api/v1alpha1/
├── eventhandler_api_types.go
├── eventhandler_base_types.go
├── groupversion_info.go
├── pysrc
│   ├── __init__.py
│   ├── constants.py
│   └── eventhandler.py
└── zz_generated.deepcopy.go
The role of each file:
-
<your_resource_name>_api_types.go: The single source of truth for your resource's data model. It defines two Go structs - one for theSpec(the user's input fields) and one for theStatus(the operational feedback your app reports back). This is the file you will edit. -
<your_resource_name>_base_types.go: Auto-generated Go boilerplate that wires yourSpecandStatusinto a complete Kubernetes Custom Resource. You generally do not need to modify this file. -
groupversion_info.go: Declares the API group (event-handler.eda.local) and version (v1alpha1) of your resource. Auto-generated; do not edit. -
zz_generated.deepcopy.go: Auto-generated low-level Go methods required by the Kubernetes controller runtime. Thezz_prefix is a convention to indicate "auto-generated, ignore me, I'll be regenerated". Never edit by hand. -
pysrc/: Python modules that mirror the Go API. Two files matter:<your_resource_name>.pyexports a class with the same name (e.g.EventHandler) that your Python scripts will import and instantiate from the input dict usingEventHandler.from_input(cr). It also exports a schema constant named<YOUR_RESOURCE_NAME>_SCHEMA(e.g.EVENTHANDLER_SCHEMA), which is aneda.Schema(...)object you'll pass whenever you need to refer to this resource type from another script.constants.pyholds field-name constants generated from the Go JSON tags. Useful when you want to avoid hard-coded strings in your scripts.
4.3.1 Understanding the Resource API#
Nokia EDA being 100% API-defined means that every application and resource is strictly described by its schema. To build this schema, EDA uses the Kubernetes Resource Model (KRM) as its foundation, coupled with EDA-specific extensions to make the rules incredibly expressive.
Every custom resource typically has two critical sections that you must define:
Spec: contains the "desired state" of the resource. Represents the inputs that the user will provide when they want to configure the Event-Handler. This is what the user fills in when creating the resource through the UI or via YAML.Status: contains the "observed state" of the resource. Represents the feedback that your app will retrieve from the network and present back to the user. The user never sets the Status - only your app does, from the State intent.
Both sections are expressed as Go structs. You don't need to be an expert Go programmer to write them: you only need to declare fields, their types (string, int32, bool, slices, structs), and their JSON tags (json:"fieldName"). If you've written a Kubernetes manifest before, this will look familiar.
4.3.2 API Annotations#
The comments and annotations directly above each struct field aren't decoration - edabuilder parses them to drive validation rules, UI hints, default values and form labels in the EDA frontend. This is the way developers provide additional metadata about the resource without writing a single line of frontend code.
Standard text comments added with // at the beginning are extracted as field descriptions - EDA parses them and uses them as tooltips in the web UI schema form, helping users understand what each input expects.
By default, the UI uses the JSON tag name as the field label, which can look like ugly camelCase to an end user. You can override the title with +eda:ui:title=<your_title> directly above the field. Use a human-readable phrase like Nodes, not nodes.
The annotation +eda:ui:autocomplete=` tells the UI to query EDA's database and offer that resource as a dropdown. For instance, autocompleting ontoponodes` lets the user pick from the actual nodes registered in the topology, instead of typing a name and risking a typo.
+kubebuilder:default=<your_default_value> sets a default that applies when the user leaves the field blank. Useful for sensible operational baselines that fit the common case (e.g. a hold-down timer of 0 ms).
You can also add validation constraints from the kubebuilder set: +kubebuilder:validation:MinItems=1 requires a list to be non-empty, +kubebuilder:validation:Minimum=0 enforces a numeric lower bound, etc. These are checked at admission time by EDA, so the user gets an immediate error instead of a confusing failure later.
4.4 Writing the Resource API#
Edabuilder scaffolds the <your_resource_name>_api_types.go file with a dummy API specification of the resource. Your goal is to come up with the actual API definition for the resource that would be sufficient to configure an Event-Handler instance on SR Linux.
Bear in mind that while the oper-group.py event-handler script already exists on the SR Linux Leaf nodes, your EventHandler resource needs to provide a simplified abstraction for the configuration of the event-handler instance. We want to allow the user to specify which nodes to target, the uplink and downlink interfaces to monitor, and operational thresholds, without having to write any of the underlying YANG syntax. That's the whole point of an intent-based abstraction.
In the event_handler/api/v1alpha1/eventhandler_api_types.go file, the scaffolded API is generated for the resource specification and status fields:
package v1alpha1

// EventHandlerSpec defines the desired state of EventHandler
type EventHandlerSpec struct {
 // INSERT ADDITIONAL SPEC FIELDS - define desired state of cluster
 // Important: Run "edabuilder generate" to regenerate code after modifying this file
 Foo string `json:"foo"`
}

// EventHandlerStatus defines the observed state of EventHandler
type EventHandlerStatus struct {
 // INSERT ADDITIONAL STATUS FIELDS - define observed state of cluster
 // Important: Run "edabuilder generate" to regenerate code after modifying this file
 Result string `json:"result,omitempty"`
}
Try your analytical skills and come up with the API schema for the EventHandlerSpec in the event_handler/api/v1alpha1/eventhandler_api_types.go file. If you get stuck, the solution is below.
Solution
// EventHandlerSpec defines the desired state of EventHandler
type EventHandlerSpec struct {
    // Target nodes where the event handler should be configured
    // +eda:ui:title=Target Nodes
    // +eda:ui:autocomplete=`{"group":"core.eda.nokia.com", "resource":"toponodes"}`
    Nodes []string `json:"nodes"`

    // List of uplink interfaces to monitor (e.g., "ethernet-1/49", "ethernet-1/{49,50}", "ethernet-1/{46..50}")
    // +eda:ui:title=Uplinks
    Uplinks []string `json:"uplinks"`

    // List of downlink interfaces to disable if uplinks fail (e.g., "ethernet-1/1", "ethernet-1/{1,2}", "ethernet-1/{1..4}")
    // +eda:ui:title=Downlinks
    Downlinks []string `json:"downlinks"`

    // Minimum number of uplinks that need to be up before downlinks are brought down
    // +eda:ui:title=Required Up Uplinks
    // +kubebuilder:default=1
    RequiredUpUplinks int32 `json:"requiredUpUplinks"`

    // Optional delay (in ms) before bringing downlinks back up
    // +kubebuilder:default=0
    HoldDownTime int `json:"holdDownTime,omitempty"`
}
Note, that the empty Status struct - you will fill it in once we get to the State intent section. EDA accepts an empty Status and shows the resource without any state information until you add fields. Some resources may not report any state, this is perfectly valid.
4.5 Preview your app#
When developing an application, you should not wait until the entire code is finished to test and try it. Iterative development is key - deploy early, deploy often, and let the EDA UI and the debug tooling tell you whether the schema looks right and your application code is behaving as expected.
Even though your app does not have any actual logic yet, you already have scaffolded the API for it, and this API can already be previewed on a running EDA instance to verify that the API definition is correct, installable, and shows up in the EDA UI exactly how you want it.
To deploy the app in the "development" mode, edabuilder provides the deploy command that will build the application container image and install it to the development registry in your configured EDA instance:
The deploy capability runs several steps in the background to bring your application live:
- Reads your configuration: It looks at the
PROJECTfile and your local deployment targets to know where to deploy. - Generates CRD and OpenAPI schemas: the deploy commands calls the
generatecommand to ensure that the CRD and OpenAPI schemas are up to date based on the API definition of all resources of the app. - Builds the container: It compiles your Go code and packages your Python scripts into a standard OCI container image.
- Pushes the image: It connects to the internal container registry of your active EDA instance and pushes the new image there.
- Installs the App: It triggers the standard EDA App Installer workflow, injecting your Custom Resource Definitions (from the
crds/folder) and starting your application.
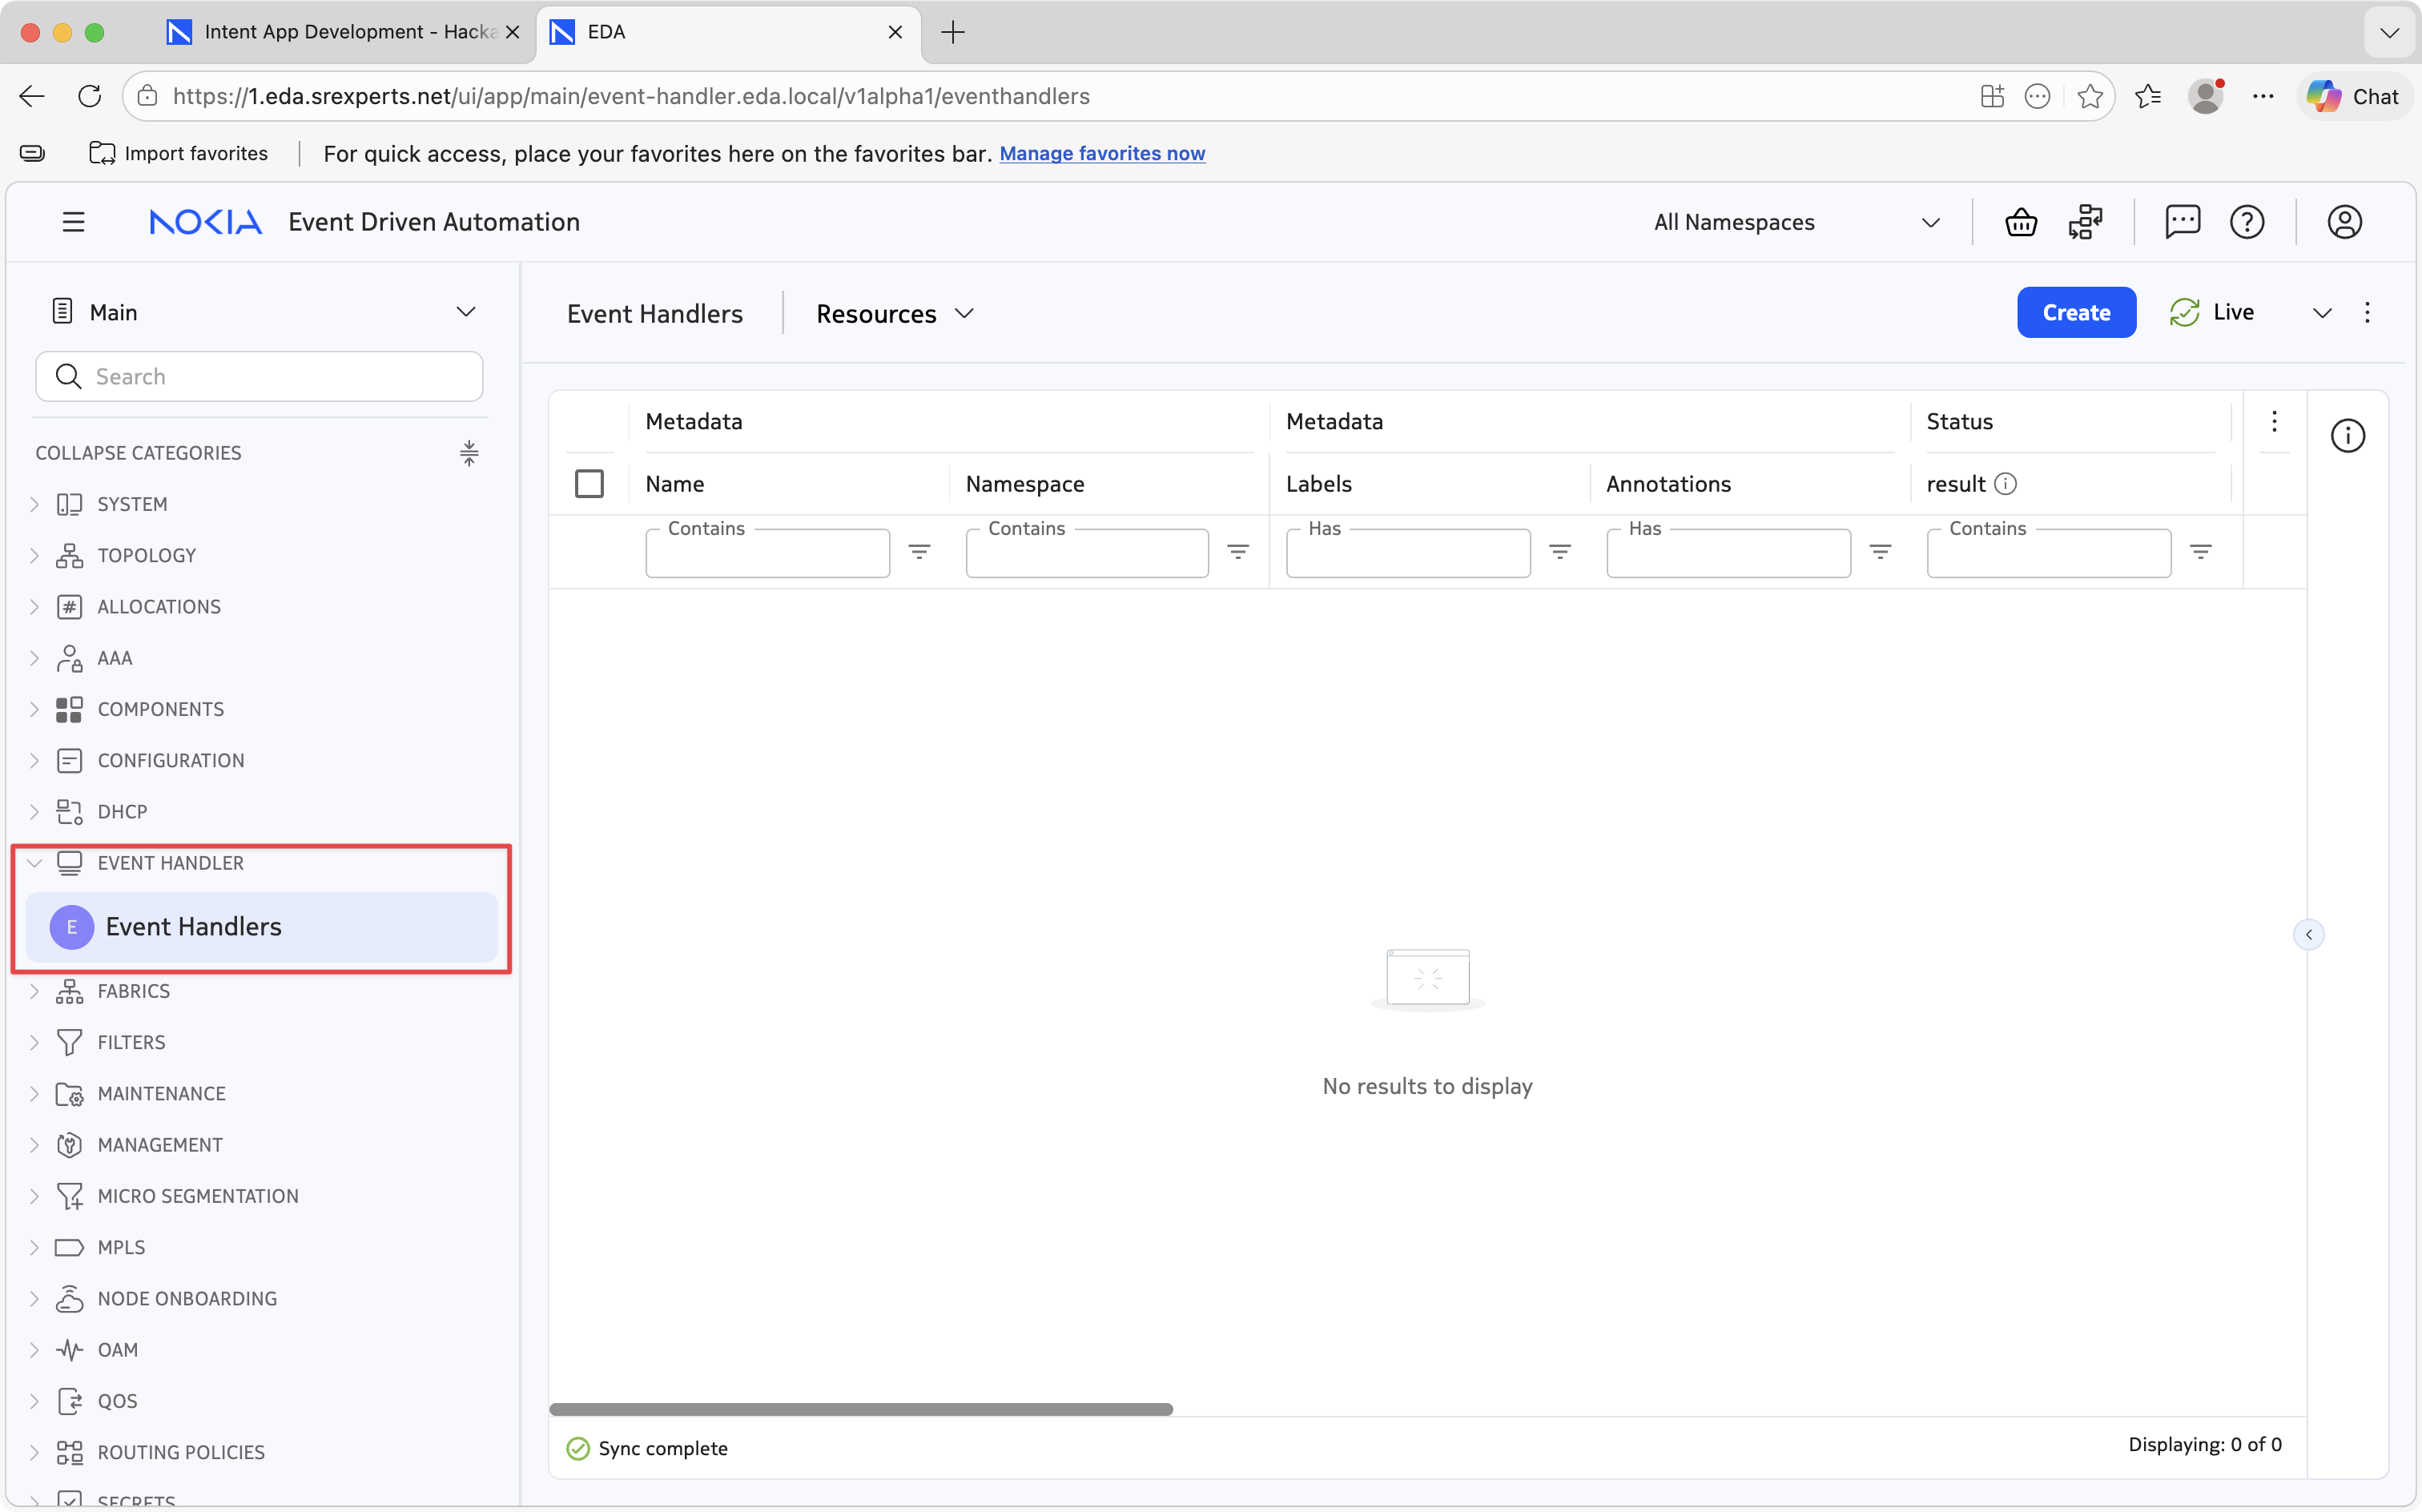
Once the command finishes, log into EDA's web interface and search for Event Handler in the application sidebar. You should be able to see your app now. If you click on it and then click on the Create button, you will see the API form rendered from the schema you just defined - the field titles, descriptions, defaults and dropdowns all driven by the annotations in your Go file.
How does our Event Handler resource end up being under the same-named application category? This is all driven by the application manifest - manifest.yaml file - that edabuilder creates for each app.
In this file you will find the components section defined like this:
  components:
    - crd:
        api:
          expose: readWrite
        path: event_handler/crds/event-handler.eda.local_eventhandlers.yaml
        schema: event_handler/openapiv3/eda_oas_event-handler.eda.local_eventhandlers.json
        ui:
          category: Event Handler
          name: Event Handlers
See, how the single component our app currently has defines the CRD (Custom Resource Definition), OpenAPI schema, UI category and name for the resource. It has been created by Edabuilder the moment we created the EventHandler resource. If you change the ui.category and redeploy the app, the resource will be shown under the new category.
At any moment during your development cycle, you can save your changes and execute edabuilder deploy --app <your_app_name> to instantly reload the new fields into the UI.
Tip: keep edabuilder deploy and edactl ... debug running side by side
A productive workflow is to keep two terminals open: one to run edabuilder deploy after each code change, and another tailing the live debug session (you'll see how to start one in the Debugging note further down). That way you see your script's output in real time as you create/modify resources from the UI.
4.6 Configuration intents#
Configuration intents are the brain of your application. They execute inside the EDA Config Engine and contain deterministic logic that translates the user's abstracted input provided through the Resource object into a concrete set of configurations to push to the target network devices, or emit lower level resources as a result of the script execution. These intents (often referred to as "scripts") are written in Python and live in the <your_app_name>/intents/ directory.
To create the boilerplate structure for our configuration intent, run from the project root:
A configuration script is associated with a particular resource via the app's manifest.yaml.
  components:
    - crd:
      # ... crd definition
    - script:
        path: event_handler/intents/eventhandler/config_intent.py
        trigger:
          kind: EventHandler
        type: config
The trigger section of the script definition tells EDA: "whenever an EventHandler resource is created, modified, or deleted, run config_intent.py script".
tree event_handler/intents/eventhandler/

event_handler/intents/eventhandler/
├── __init__.py
├── config_intent.py
├── eda.py
├── handlers.py
├── init.py
├── srl.py
└── sros.py
The directory with python scripts contain more files than just config_intent.py, which is just an entrypoint for the configuration intent. It also contains the handler scripts for the potential different platforms in case your resource supports multiple target platforms.
-
config_intent.py: The entrypoint. When a user creates or modifies a resource of the kind declared in themanifest.yaml, the EDA Config Engine imports this file and calls itsprocess_cr(cr)function with the raw CR as a dict. This file should stay tiny - its only job is to parse the input into a typed Python object, look up the right handler, and delegate. -
handlers.py: A small dispatcher that maps platform names (PLATFORM_EDA,PLATFORM_SRL,PLATFORM_SROS, etc.) to handler instances. The reason this separation exists is so that the same app can transparently support multiple network operating systems - for our app we will only targetPLATFORM_SRL, since our app emits the node-level configuration and the only supported platform is Nokia SR Linux. -
eda.py: The "EDA-level" handler. This handler is used when the app emits other EDA resources, instead of generating the node-level configuration. A lot of apps in EDA only use theedahandler, since they are higher-level applications that emit lower-level resources likeInterface,RoutePolicy, etc. The lower-level resources in their turn emit the node-level configuration. This compositional pattern is very powerful and enables reusability of lower-level resources by higher-level applications. -
srl.py/sros.py: Platform-specific handlers for apps that emit vendor configuration blobs directly. In our Event Handler app we will use thesrl.pyhandler to emit the node-level configuration for SR Linux that configures the event-handler instance on the target nodes. -
init.py: Optional hooks for input validation and global initialization if your app needs cross-field validation or global setup before the handler runs. -
__init__.py: Marks the directory as a Python package.
4.6.1 The entrypoint: config_intent.py#
Let's modify config_intent.py to wire the entrypoint to our handler. Our goal is straightforward:
- Receive the raw CR as a dict.
- Convert it into a typed
EventHandlerPython object using the model auto-generated byedabuilder. - Fetch the nodes provided in the
nodesfield of the resource object. - Instantiate the handler for the platform recorded in the fetched node's specification.
A more in-depth tutorial on how to write Intent scripts is available in the Intent development section of the EDA Docs. Below you will find the solution to this challenging part of the exercise.
Solution
import utils.exceptions as e
import utils.node_utils as nutils
from common.constants import PLATFORM_SRL
from core.pysrc.toponode import TopoNode
from event_handler.api.v1alpha1.pysrc.eventhandler import EventHandler
from event_handler.intents.eventhandler.handlers import get_config_handler
from event_handler.intents.eventhandler.init import init_globals_defaults, validate


def process_cr(cr):
    """Process EventHandler CR."""
    cr_obj = EventHandler.from_input(cr)
    if cr_obj is None:
        return

    cr_name = cr_obj.metadata.name
    validate(cr_obj)
    init_globals_defaults(cr_obj)

    nodes: dict[str, TopoNode] = {}  # init dictionary of nodes

    # fetch all referenced nodes and store in nodes dict
    if cr_obj.spec.nodes is not None and len(cr_obj.spec.nodes) > 0:
        for node in cr_obj.spec.nodes:
            if node not in nodes:
                node_cr = nutils.get_node(name=node)
                if node_cr is None:
                    msg = f"Node {node} not found"
                    raise e.InvalidInput(msg)
                nodes[node] = TopoNode.from_input(node_cr)

    for node, node_cr in nodes.items():
        if node_cr is not None and node_cr.spec is not None:
            node_spec = node_cr.spec
            if node_spec.operatingSystem is not None:
                if node_spec.operatingSystem == PLATFORM_SRL:
                    srl_handler = get_config_handler(PLATFORM_SRL)
                    if srl_handler is not None:
                        srl_handler.handle_cr(cr_obj, node_cr)
                else:
                    msg = f"Operating system unsupported for {node}, os is {node_spec.operatingSystem}"
                    raise e.InvalidInput(msg)
            else:
                msg = f"Operating system unsupported for {node}, os is {node_spec.operatingSystem}"
                raise e.InvalidInput(msg)
Note
A few details worth highlighting:
EventHandler.from_input(cr)is the canonical way to turn the raw input dict into a typed object. After this call you can access fields with autocomplete:cr_obj.spec.nodes,cr_obj.metadata.name, etc. If the input is malformed it returnsNone, which is why we guard withif cr_obj is None: return.process_cris the entrypoint name expected by the Config Engine. Don't rename it.- We are ranging over the node names provided by the user in the
nodesfield of the resource object and fetching the correspondingTopoNodeobject from the EDA database. Thenutils.get_node(name=node)is a function provided by EDA to fetch the node object from the database, but since it returns a raw dict representation of the resource, we convert it to aTopoNodeobject using theTopoNode.from_input(node_cr)method. - In the
srl_handler.handle_cr(cr_obj, node_cr)call we pass not only the EventHandler resource object, but also theTopoNodeobject for the node. This is because theTopoNodeobject contains the node name and we want to use it to name theNodeConfigresource that we will emit with the node-level configuration. More on this in the next section.
4.6.2 The handler: srl.py#
Now the interesting part. srl.py is where we actually transform the user's inputs for the EventHandler resource into the device-level configuration. Your code logic should've ended with the identified handler and now you need to implement the handler logic itself:
Edabuilder scaffolds the empty handler method for you to implement:
Your high-level implementation plan should look like this:
- Build the YANG payload for the SR Linux Event-Handler subtree at
.system.event-handlerby browsing the SR Linux CLI or the YANG model tree of the.system.event-handlersubtree. This is a JSON document with theinstancelist, thepathsto monitor (uplinks), and theoptionsblock (downlinks, required-up-uplinks, hold-down-time). - Wrap that payload in a
NodeConfigresource - the lowest-level resource EDA understands for pushing config to a device. - Emit one
NodeConfigper target node, named after the resource and the node so they're uniquely identifiable.
Three things to know before writing the code:
The eda module from eda_common. Imported as import eda_common as eda, this is your gateway to the EDA Intent API. The single most important call is eda.update_cr(...) - it creates or updates a resource with idempotent semantics ("declare what you want; EDA reconciles it"). It takes a schema= (the schema object identifying what kind of resource), a name=, and a spec= dictionary.
The shape of a NodeConfig spec. It needs two fields: node-endpoint (the target node name) and configs (a list of payloads, each with a path, a JSON-encoded config string, and an operation like "Create" or "Replace"). EDA picks this up, dispatches it to the right vendor agent, and applies it to the device.
Realizing this task may be challenging, below you will find the solution to this part of the exercise.
import json

import eda_common as eda

from core.pysrc.nodeconfig import Metadata, NodeConfig, NodeConfigSpec, NodeConfigTupleSpec
from core.pysrc.toponode import TopoNode
from event_handler.api.v1alpha1.pysrc.eventhandler import EventHandler


class SrlBaseConfigHandler:
    def handle_cr(self, cr_obj: EventHandler, node_cr: TopoNode):
        node_config = NodeConfig(
            metadata=Metadata(
                name=f"event-handler-{cr_obj.metadata.name}-{node_cr.metadata.name}",
                namespace=cr_obj.metadata.namespace,
            ),
            spec=NodeConfigSpec(node_endpoint=node_cr.metadata.name, configs=self._generate_config(cr_obj)),
        )

        eda.update_cr(**node_config.to_input())

    def _generate_config(self, cr_obj: EventHandler) -> list[NodeConfigTupleSpec]:
        configs = []

        """Build the SR Linux YANG payload for .system.event-handler."""
        # The Event-Handler 'paths' field expects monitored interface paths
        # in the form 'interface <iface> oper-state'.
        uplink_paths = [f"interface {uplink} oper-state" for uplink in cr_obj.spec.uplinks]

        # Mandatory options for the oper-group script: down-links and the
        # threshold of required-up-uplinks.
        options_objects = [
            {"name": "down-links", "values": cr_obj.spec.downlinks},
            {"name": "required-up-uplinks", "value": str(cr_obj.spec.requiredUpUplinks)},
        ]

        # Optional hold-down-time, only added if the user specified a non-zero value.
        if cr_obj.spec.holdDownTime:
            options_objects.append({"name": "hold-down-time", "value": str(cr_obj.spec.holdDownTime)})

        # Build the structured payload that maps to the YANG model on the device.
        node_config = {
            "instance": [
                {
                    "name": cr_obj.metadata.name,
                    "admin-state": "enable",
                    "upython-script": "oper-group.py",
                    "paths": uplink_paths,
                    "options": {"object": options_objects},
                }
            ]
        }

        # Append the structured payload to the configs list.
        configs.append(
            NodeConfigTupleSpec(
                path=".system.event-handler",
                operation="Create",
                config=json.dumps(node_config),
            )
        )

        return configs
A few notes on the design:
- The
name=f"event-handler-{cr_obj.metadata.name}-{node_cr.metadata.name}"pattern produces a unique, predictable name for each emittedNodeConfig. - We use
"operation": "Create"in theNodeConfigTupleSpec, but despite the operation beingCreate, theNodeConfigresource will be updated if it already exists. You will always use"operation": "Create"in your intents.
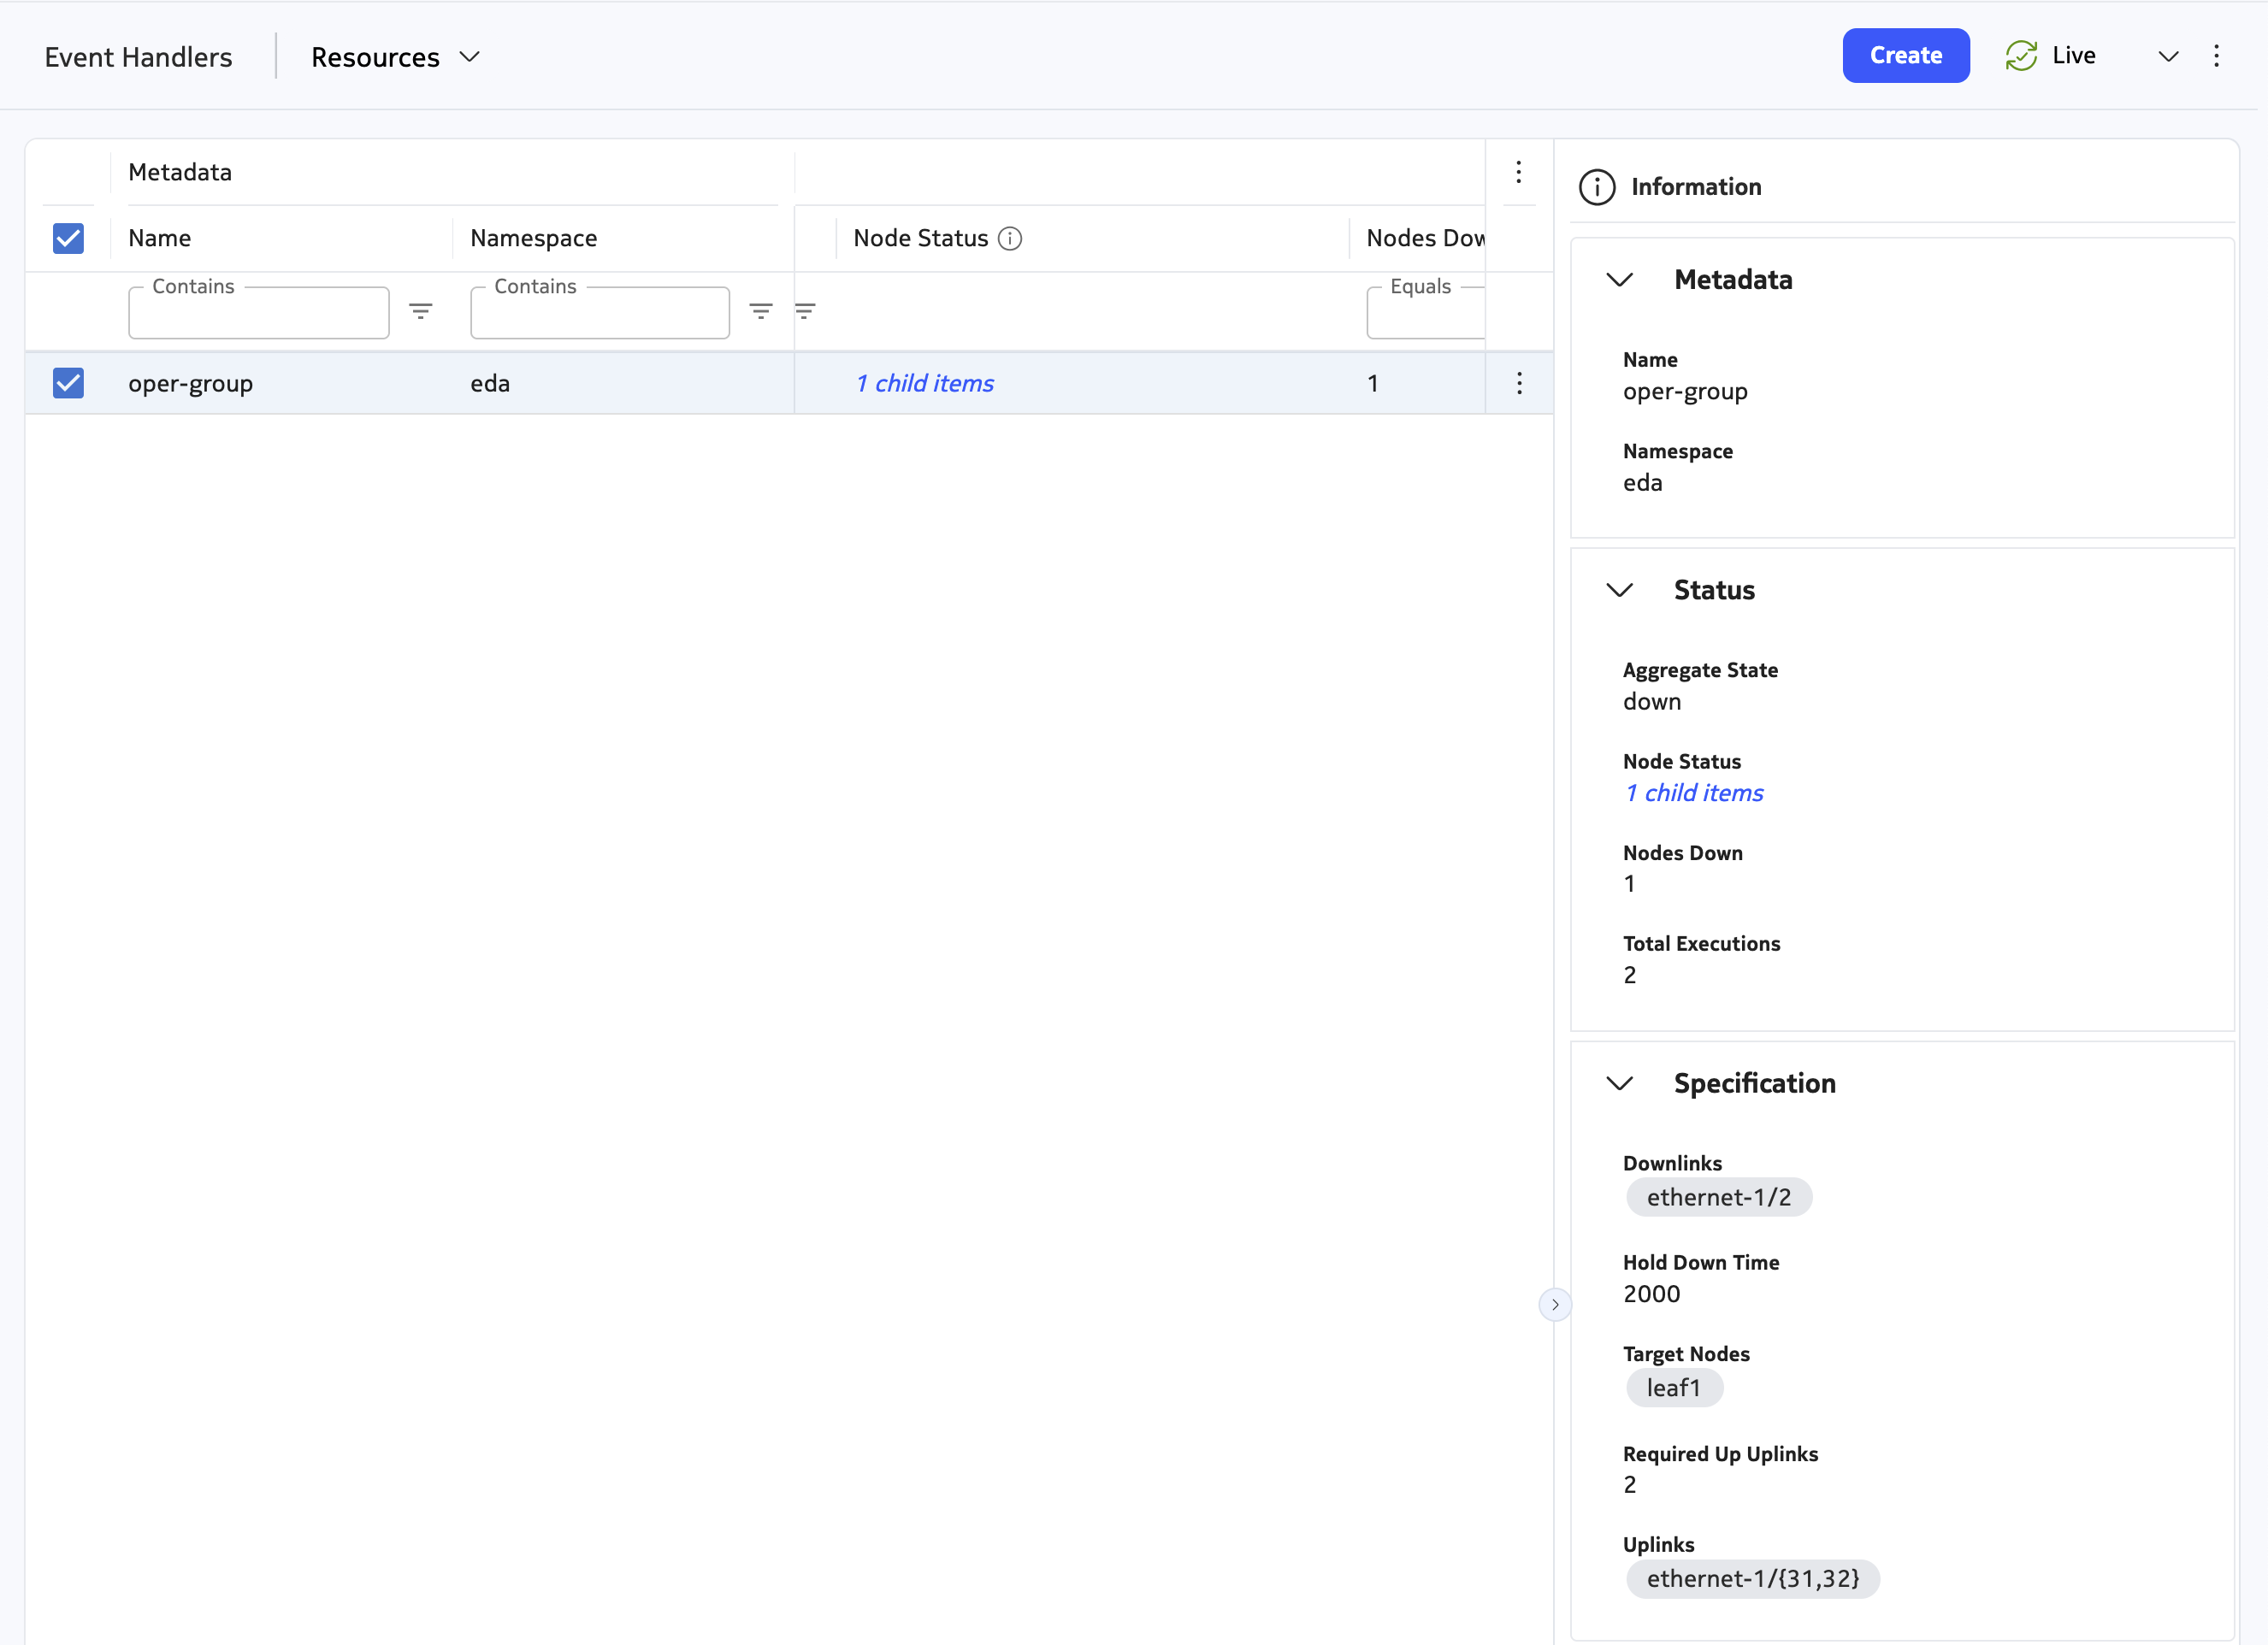
Once you have written both files, deploy with edabuilder deploy --app event_handler and create an EventHandler object from the EDA UI (use Dry Run to verify that the configuration is valid). Log into the target nodes and verify the configuration was pushed correctly. Iterate on your Python logic if needed. An example YAML could be similar to:
apiVersion: event-handler.eda.local/v1alpha1
kind: EventHandler
metadata:
  name: oper-group
  namespace: eda
spec:
  holdDownTime: 2000
  requiredUpUplinks: 2
  downlinks:
    - ethernet-1/2
  nodes:
    - gXX-leaf11
    - gXX-leaf12
    - gXX-leaf13
  uplinks:
    - ethernet-1/{31,32}
Debugging the Config Engine
EDA provides a powerful live debug session attached to the Config Engine. It's the single most useful tool for understanding why something is or isn't happening:
(Note the trailing s - the command takes the resource Kind in lowercase plural form.)
This command opens a live tail on the Config Engine. It will wait for an <your_resource_name> resource to be created or modified in the EDA UI.
Once you create the resource, the debug output instantly shows you:
InputCR: the raw CR your script received.Stdout: everylog_msg(...)call your script made.OutputDb: the resources your script emitted - in our case the threeNodeConfigCRs, one per target node, each carrying the JSON-encoded YANG payload. This is the part where you verify your handler did the right thing.Error: any traceback if your script crashed. Tracebacks include the exact line number, which is invaluable.
4.7 Modify the State scripts#
Automation is incomplete without visibility. While configuration intents handle the desired state (what a user wants), state intents are responsible for surfacing the actual state (what a network is currently doing). State intents subscribe to operational data on the target devices (or lower-level resources), parse it, and write it back into the parent resource's status field so it shows up live in the EDA UI.
In this section we will:
- Create the internal State Resource that triggers the State intent.
- Extend the API Resource with a schema that the UI knows how to render.
- Make the Config handler emit the state resource after emitting the device-level configuration.
- Implement the entrypoint of the state intent.
- Implement the actual telemetry collection in the state handler.
4.7.1 Create the State Resource#
EDA requires a separate Resource type to drive the state engine. Think of it as the "trigger" CR: when the Config handler emits one, the State Engine wakes up; when the device telemetry it cares about changes, the State Engine re-invokes the handler.
Use the create resource command of edabuilder with the --suppress-ui flag, which marks it as an internal resource so it does not show up in the EDA web interface (users should never see or create state resources manually).
Warning
Be sure to append State directly to <your_resource_name> (e.g. EventHandlerState, not EventHandler-State). The naming convention matters because the Python module names and schema constants are derived from it.
The previous command generates the API definition files in .go format inside event_handler/api/v1alpha1/. Take a look at the new files that have been added:
Resource API layout
tree event_handler/api/v1alpha1/

event_handler/api/v1alpha1/
├── eventhandler_api_types.go
├── eventhandler_base_types.go
├── eventhandlerstate_api_types.go
├── eventhandlerstate_base_types.go
├── groupversion_info.go
├── pysrc
│   ├── __init__.py
│   ├── constants.py
│   ├── eventhandler.py
│   └── eventhandlerstate.py
└── zz_generated.deepcopy.go
The new files added by the command are:
-
<your_resource_name>state_api_types.go: Defines the schema for the State resource. It typically only needs a smallSpec(or none at all) since its main purpose is acting as a trigger. We will use theSpecto carry the list of target nodes from the Config handler to the State handler, so the State handler does not need to look up the parent CR - a small but useful optimization. -
<your_resource_name>state_base_types.go: The Go boilerplate that registers your State resource into the Kubernetes Resource Model (KRM). Generally you do not need to modify this file. -
pysrc/<your_resource_name>state.py: An auto-generated Python module that mirrors the Go schema. Most importantly, it exports anEVENTHANDLERSTATE_SCHEMAconstant (aeda.Schema(...)object) that you will use whenever you need to refer to this resource type from Python. Note that the schema is not inpysrc/constants.py- it lives next to the Python class itself.
Edit state resource API definition in <your_app_name>/api/v1alpha1/<your_resource_name>state_api_types.go and replace the auto-generated dummy Spec with a single nodes field. The Status block can stay empty - the State CR has no status of its own; it writes status into the parent EventHandler. If you are in trouble, you can take a look at the solution below.
Solution
// EventHandlerStateSpec defines the desired state of EventHandlerState.
// This resource is an internal trigger emitted by the config intent. It
// carries just the information the state intent needs to query telemetry,
// so we don't have to look up the parent CR.
type EventHandlerStateSpec struct {
    // Target nodes to query for Event-Handler telemetry.
    Nodes []string `json:"nodes,omitempty"`
}

// EventHandlerStateStatus defines the observed state of EventHandlerState.
type EventHandlerStateStatus struct {
}
4.7.2 Define the status API#
The EventHandlerState resource is an internal object, because the actual state should be reflected in the Status of the user-facing EventHandler resource. So we need to define what that EventHandler resource status looks like.
There are two complementary ways to expose status fields, and for streaming telemetry it pays off to use both at the same time:
- Top-level scalar fields (strings, integers, etc.) appear as additional columns in the main resource list view. They refresh automatically when observed in the UI.
- Nested lists of structs appear behind a "N child items" link that opens a popup with a tabular view. The popup shows detail per item but it does not refresh while open - the user has to close and reopen it to see the updated values.
For our app we want both: aggregated counters at the top (always live, useful for at-a-glance monitoring), and a per-node detail table (useful when the user needs to drill in). Since a single EventHandler resource can target multiple nodes, the per-node detail goes in a list of EventHandlerNodeStatus structs and the aggregates go as plain fields next to it.
Edit event_handler/api/v1alpha1/event_handler_api_types.go to modify the Status struct. Take a look at the Displaying information documentation to look at the parameters that will be displayed by the nodes. Some of the most relevant parameters are last-execution/end-time, last-execution/output/ { path & last-state } and statistics/execution-count. These parameters will display per-node detail and for displaying aggregated data, you can aggregate the state of all nodes and the number of nodes where downlinks have been brought down and the total number of event-handler executions, apart from referencing the nested list. If you are in trouble, you can take a look at the solution below.
Solution
// EventHandlerStatus defines the observed state of EventHandler
type EventHandlerStatus struct {
  // Aggregated state across all target nodes: "up", "down" or "degraded".
  // Top-level scalar -> appears as a column in the main list and refreshes live.
  // +eda:ui:title=Aggregate State
  AggregateState string `json:"aggregateState,omitempty"`

  // Number of target nodes whose last computed state is "down".
  // +eda:ui:title=Nodes Down
  NodesDown int32 `json:"nodesDown,omitempty"`

  // Sum of execution counts across all target nodes.
  // +eda:ui:title=Total Executions
  TotalExecutions int32 `json:"totalExecutions,omitempty"`

  // Per-node operational state of the Event-Handler instance.
  // Nested list -> rendered as "N child items" popup with one row per node.
  // +eda:ui:title=Node Status
  NodeStatus []EventHandlerNodeStatus `json:"nodeStatus,omitempty"`
}

// EventHandlerNodeStatus represents per-node operational state collected from a target
// One entry per node referenced in EventHandlerSpec.nodes
type EventHandlerNodeStatus struct {
  // Name of the node where this Event-Handler instance is running
  // +eda:ui:title=Node
  NodeName string `json:"nodeName"`

  // Last operational state computed by the upython script (e.g. "up", "down")
  // +eda:ui:title=Last State
  LastState string `json:"lastState,omitempty"`

  // Path that the Event-Handler last modified on the device
  // (e.g. "interface ethernet-1/2 oper-state")
  // +eda:ui:title=Modified Path
  Path string `json:"path,omitempty"`

  // End-time timestamp of the last execution
  // +eda:ui:title=Last Execution
  EndTime string `json:"endTime,omitempty"`

  // Total number of executions since the instance was deployed
  // +eda:ui:title=Execution Count
  ExecutionCount int32 `json:"executionCount,omitempty"`
}
4.7.3 Wire the Config handler to trigger the State engine#
State intents do not run on their own. The standard EDA pattern is that the Config handler emits the corresponding State resource at the end of its execution. When the Config Engine pushes that State resource into the cluster, the State Engine component triggers the associated state intent and passes to it the State resource. This means that Config handler implementation should have the logic to create that State resource, linking the two halves of the app before creating the state logic itself.
So the Config handler we wrote in srl.py needs one extra step: after emitting all the per-node NodeConfig resources, emit a single EventHandlerState resource to trigger the state intent.
Pass the list of target nodes inside State resource's spec so the State intent knows which devices to query.
This state resource song and dance might be challenging to crack at once, the documentation on this topic may help you understand the concept a bit more. And you can also take a look at the solution below.
Solution
# previous imports
import event_handler.api.v1alpha1.pysrc.eventhandlerstate as eventhandlerstate


class SrlBaseConfigHandler:
    def handle_cr(self, cr_obj: EventHandler, node_cr: TopoNode):
        node_config = NodeConfig(
            metadata=Metadata(
                name=f"event-handler-{cr_obj.metadata.name}-{node_cr.metadata.name}",
                namespace=cr_obj.metadata.namespace,
            ),
            spec=NodeConfigSpec(node_endpoint=node_cr.metadata.name, configs=self._generate_config(cr_obj)),
        )

        eda.update_cr(**node_config.to_input())

        # construct and emit the state resource
        event_handler_state = eventhandlerstate.EventHandlerState(
            metadata=eventhandlerstate.Metadata(
                name=f"event-handler-state-{cr_obj.metadata.name}",
                namespace=cr_obj.metadata.namespace,
            ),
            spec=eventhandlerstate.EventHandlerStateSpec(nodes=cr_obj.spec.nodes),
        )

        eda.update_cr(**event_handler_state.to_input())
4.7.4 Implement the State intent entrypoint#
When the State resource is created, it is being watched by the State Engine component in EDA, which in its own turn, calls the function process_state_cr(cr) defined in state_intent.py. This function is the equivalent of process_cr(cr) in the Config side - it parses the input dict into a typed Python object and routes it to the correct handler.
To create the boilerplate structure for the state intent, run:
This command creates a directory with the intent code for the EventHandlerStateresource, a neighbor of the config intent we dealt with before:
tree event_handler/intents/eventhandlerstate/

event_handler/intents/eventhandlerstate/
├── __init__.py
├── eda_state.py
├── init.py
├── state_handlers.py
└── state_intent.py
Note
At the same time, the application manifest.yaml file now features entries for the state resource CRD and its intent script:
    - crd:
        api:
          expose: none
        path: event_handler/crds/event-handler.eda.local_eventhandlerstates.yaml
        schema: event_handler/openapiv3/eda_oas_event-handler.eda.local_eventhandlerstates.json
    - script:
        path: event_handler/intents/eventhandlerstate/state_intent.py
        trigger:
          kind: EventHandlerState
        type: state
The role of each file in the event_handler/intents/eventhandlerstate/ directory:
-
state_intent.py: The entrypoint. The State Engine imports this module and calls itsprocess_state_crfunction whenever the State resource is created or modified, or whenever subscribed telemetry paths change on a target device. This file should stay small: parse the input, look up the right handler, delegate. -
state_handlers.py: A tiny dispatcher that maps platform names to handler instances. The state resources almost always use theedahandler. -
eda_state.py: The handler implementation for EDA platform. -
srl.py: This is where the heavy lifting will happen - we will create the handler for the SR Linux platform that will deal with querying the device state, parsing telemetry, computing aggregates, and writing back the parent's status. -
init.py: Optional hooks for validation and global initialization. For this app we leave them empty; they exist mainly for more complex apps that need cross-resource validation.
Edit state_intent.py, state_handlers.py, and create srl.py to swap the PLATFORM_EDA handler scaffolded by edabuilder for an SR Linux handler.
Solution
#!/usr/bin/env python3
import eda_common as eda

from common.constants import PLATFORM_SRL
from event_handler.api.v1alpha1.pysrc.eventhandlerstate import EventHandlerState
from event_handler.intents.eventhandlerstate.init import init_globals_defaults, validate
from event_handler.intents.eventhandlerstate.state_handlers import get_state_handler
from utils.log import log_msg


def process_state_cr(cr):
    log_msg("EventHandlerState CR:", dict=cr)
    cr_obj = EventHandlerState.from_input(cr)
    validate(cr_obj)
    init_globals_defaults(cr_obj)
    handler = get_state_handler(PLATFORM_SRL)
    handler.handle_cr(cr_obj)
import eda_common as eda

import event_handler.api.v1alpha1.pysrc.constants as c
from event_handler.api.v1alpha1.pysrc.eventhandlerstate import EventHandlerState


class SrlBaseStateHandler:
    def handle_cr(self, cr_obj: EventHandlerState):
        # implement this
        pass
from common.constants import PLATFORM_EDA, PLATFORM_SRL

from .eda_state import EdaStateHandler
from .srl import SrlBaseStateHandler

_state_handlers = {
    PLATFORM_EDA: EdaStateHandler(),
    PLATFORM_SRL: SrlBaseStateHandler(),
}


def get_state_handler(platform):
    if platform == PLATFORM_EDA:
        return _state_handlers[PLATFORM_EDA]
    if platform == PLATFORM_SRL:
        return _state_handlers[PLATFORM_SRL]
    else:  # pragma: no cover
        raise NotImplementedError(f"Platform {platform} not supported")
4.7.5 Implement the State handler#
Now the interesting part. srl.py is where we actually pull telemetry from the SR Linux using EDA's Intent API and parse and aggregate it into the fields defined in EventHandler status.
Two important things to understand before reading the code:
1. How telemetry is read. EDA exposes a top-level module called eda_state (imported as import eda_state as estate) that is used to query EDA's in-memory database.
estate.list_db(path=..., fields=[...])returns an iterator of dicts containing the{"value": {...}, "path": "..."}values. Usenext(...)when you expect at most one result, or iterate when you expect many. Thevaluedict contains exactly the leaf fields you asked for.- Calling
list_dbfor a given path also subscribes the state intent to that path. From then on, any change to that telemetry on any target node will re-invokeprocess_state_cr. This is what makes the UI refresh in near real time.
2. The path syntax. The path string is provided in the JSPath notation, for example: .namespace{...}.node{.name=="<node>"}.<os>.<yang-tree>, where <os> is srl for SR Linux. There are two points to take into account:
- The list-key syntax for YANG list entries is
.<list>{.<key>=="<value>"}, not the gNMI[name=value]style. list_dbonly returns the direct leaves of the path you queried, not nested containers. If you need fields fromlast-executionorstatistics, you must query those container paths explicitly. Asking for them as fields at the parent level returns nothing.
The solution below makes one query per scope - one for the instance itself (for oper-state), one for last-execution (for end-time and output), and one for statistics (for execution-count). It then computes aggregates across all nodes and writes everything back to the parent EventHandler in a single eda.update_cr call.
The output field of last-execution is a JSON-encoded string produced by the Event-Handler execution on SR Linux. It contains the actions the script took (which path it modified) and the persistent state it tracks (last-state). We parse it to extract the Modified Path and Last State columns.
Edit the srl.py file to query the target node's state following the above notes. If you are in trouble, you can take a look at the solution below.
import json

import eda_common as eda
import eda_state as estate

import event_handler.api.v1alpha1.pysrc.eventhandler as eventhandler
from event_handler.api.v1alpha1.pysrc.eventhandlerstate import EventHandlerState
from utils.log import log_msg


def _list_one(path, fields):
    """Wrap next(estate.list_db(...)) returning None on miss/error.

    list_db returns an iterator of {"value": {...}, "path": "..."}.
    For paths that resolve to a single container we just want the value dict.
    """
    try:
        result = next(estate.list_db(path=path, fields=fields))
    except StopIteration:
        return None
    except Exception as exc:
        log_msg(f"[state] list_db EXC for {path} fields={fields}: {type(exc).__name__}: {exc!r}")
        return None
    if result is None or "value" not in result:
        return None
    return result["value"]


class SrlBaseStateHandler:
    def handle_cr(self, cr_obj: EventHandlerState):
        log_msg(f"Handling EventHandlerState CR: {cr_obj.metadata.name}")

        nodes = cr_obj.spec.nodes
        if nodes is None:
            log_msg(f"No target nodes found for EventHandlerState CR: {cr_obj.metadata.name}")
            return

        instance_name = cr_obj.metadata.name

        # Build the per-node detail list. One entry per target node.
        node_status_list: list[eventhandler.EventHandlerNodeStatus] = []
        for node in nodes:
            entry = self._collect_node_status(node, instance_name)
            log_msg(f"[state] {node} -> {entry}")
            node_status_list.append(entry)

        # Compute aggregates across all nodes. These become the top-level
        # scalar fields, which the UI shows as live-refreshing columns
        # next to the "N child items" popup.
        nodes_down = sum(1 for e in node_status_list if e.lastState == "down" if e.lastState is not None)
        total_exec = sum(e.executionCount if e.executionCount is not None else 0 for e in node_status_list)
        total_nodes = len(node_status_list) if node_status_list is not None else 0

        if total_nodes == 0:
            aggregate = "unknown"
        elif nodes_down == 0:
            aggregate = "up"
        elif nodes_down == total_nodes:
            aggregate = "down"
        else:
            aggregate = "degraded"

        # Write everything back to the parent EventHandler in one call.
        # Keys must match the JSON tags from EventHandlerStatus.
        event_handler = eventhandler.EventHandler(
            metadata=eventhandler.Metadata(
                name=cr_obj.metadata.name,
                namespace=cr_obj.metadata.namespace,
            ),
            status=eventhandler.EventHandlerStatus(
                aggregateState=aggregate,
                nodesDown=nodes_down,
                totalExecutions=total_exec,
                nodeStatus=node_status_list,
            ),
        )
        eda.update_cr(**event_handler.to_input())

    @staticmethod
    def _collect_node_status(node, instance_name) -> eventhandler.EventHandlerNodeStatus:
        """Pull telemetry for one Event-Handler instance on one node."""
        entry = eventhandler.EventHandlerNodeStatus(
            nodeName=node,
            lastState="unknown",
            path="unknown",
            endTime="unknown",
            executionCount=0,
        )

        # Path scoping conventions in EDA:
        #   .node{.name=="<node>"}        - target a specific managed node
        #   .srl                          - the SR Linux YANG namespace
        #   .system.event-handler.instance{.name==...}  - the YANG sub-tree
        instance_path = f'.node{{.name=="{node}"}}.srl.system.event-handler.instance{{.name=="{instance_name}"}}'

        # --- Instance-level oper-state (leaf at the instance container).
        top = _list_one(instance_path, ["oper-state"])
        if isinstance(top, dict):
            oper = top.get("oper-state")
            if oper:
                entry.lastState = str(oper)

        # --- last-execution leaves: query the container path directly.
        last_exec = _list_one(
            f"{instance_path}.last-execution",
            ["end-time", "output"],
        )
        if isinstance(last_exec, dict):
            end_time = last_exec.get("end-time")
            if end_time:
                entry.endTime = str(end_time)

            # 'output' is a JSON string emitted by the upython script.
            output_raw = last_exec.get("output")
            if output_raw:
                try:
                    parsed = json.loads(output_raw)
                except (ValueError, TypeError):
                    parsed = {}
                if isinstance(parsed, dict):
                    pdata = parsed.get("persistent-data") or {}
                    last_state = pdata.get("last-state") if isinstance(pdata, dict) else None
                    if last_state:
                        entry.lastState = str(last_state)

                    modified = []
                    for action in parsed.get("actions") or []:
                        if not isinstance(action, dict):
                            continue
                        sep = action.get("set-ephemeral-path")
                        if isinstance(sep, dict) and sep.get("path"):
                            modified.append(sep["path"])
                    if modified:
                        entry.path = ", ".join(modified)

        # --- statistics leaves: query the container path directly.
        stats = _list_one(
            f"{instance_path}.statistics",
            ["execution-count"],
        )
        if isinstance(stats, dict):
            ec = stats.get("execution-count")
            if ec is not None:
                try:
                    entry.executionCount = int(ec)
                except (TypeError, ValueError):
                    pass

        return entry
4.7.5.1 Debugging the State engine#
The state engine has its own debug command, separated from the config one:
(Note the trailing s - the command takes the resource Kind in lowercase plural form.)
Example for our resource:
This live-tails the State Engine. Each invocation prints four blocks that are extremely helpful when something is not working:
InputCR: theEventHandlerStateCR as the engine sees it.nullon the first invocation (when the subscription is being registered), populated from the second invocation onward.Stdout: anything your script logs withlog_msg. Used for debugging and logging.InputDb: the values in EDA's state database for every path your script queried vialist_dbapi call. If a path is missing or maps to{}, your script saw nothing for it. This is the single most useful diagnostic when telemetry is not coming through.OutputDb: the changes your script made - typically thestatusblock written to the parent original resource (EventHandler.Statusin our case).Subscriptions: the list of telemetry paths your script is subscribed to. Changes to these paths will trigger state script execution. The[changed from last run - output db will NOT be published]marker means the subscription set changed during this run; EDA suppresses the output to avoid acting on partial data, and re-invokes the script. This is normal on the first invocation and after any code change; it should disappear on subsequent runs once subscriptions are stable.
If all is well, you should refresh the browser and delete and re-add the EventHandler resource to see it having the status populated with the data we calculated in the state handler.
This completes the loop:
User creates the EventHandler intent
    -> Config Engine pushes config to each target node
    -> Config Engine emits an EventHandlerState CR
    -> State Engine subscribes to the relevant telemetry paths
    -> State Engine re-invokes the handler on each telemetry change
    -> Handler writes aggregates + per-node detail to the parent's status
    -> EDA UI reflects the new state
4.8 Test your own App#
Writing the code is only half the fun; seeing your automation respond dynamically to real-world network events is where the magic happens! To ensure the application you have developed is working properly, we will simulate a network failure by bringing some uplinks down.
In the provided lab topology, client12 is multi-homed to all three available Leafs. We will use this client to verify that our newly configured Event-Handler successfully displays the Leaf status when its uplinks fail.
Follow these steps to test your app:
-
Generate continuous traffic: Log into
client12and start sending continuous ping traffic to bothclient11andclient13. This establishes an active data plane so you can see traffic failover in real time. -
Trigger the uplink failure: Simulate a network outage by navigating to the EDA UI (or logging directly into the SR Linux CLI) and start shutting down the Spine's downlink interfaces.
-
Observe the Event-Handler in action: As soon as Leaf's uplinks go down, a chain reaction will occur:
-
The
oper-group.pyscript running locally on the SR Linux Leaf will detect the uplink failure. -
It will immediately bring down the Leaf's downlink interface connected to
client12. -
Because the downlink goes down,
client12will instantly detect the link failure and seamlessly reroute its traffic over to one of the other two healthy Leaf routers. -
Navigate to your
EventHandlerresource in the EDA UI. Thanks to the State intent scripts you just wrote, you should see the operational status clearly reflect the failure in real time without needing to log into the Leaf! -
Bring the Leaf's uplinks back up. The Event-Handler will automatically detect the recovery and bring the downlink back up, returning the network to its fully healthy state.
-
Repeat the process with another Leaf to verify that your EDA application successfully configured the Event-Handler logic across the entire fabric.
5. Summary#
Congratulations! Building a cloud-native application from scratch is no small feat, but you have successfully navigated the entire process.
If you have made it this far, you have completed this activity and achieved the following major milestones:
-
Mastered network extensibility: You learned how the Event-Handler works inside Nokia SR Linux to automate local device reactions to network events.
-
Understood the EDA architecture: You explored the core components of an EDA application, understanding how Custom Resources, Go-based APIs, and Python intent scripts work together in harmony.
-
Built an Intent-based Application: You successfully developed, deployed, and tested your very own EDA application, bridging the gap between high-level user abstraction and low-level network configuration.
We hope you found this deep-dive useful and that it demystified the process of extending the platform. You now have the foundational skills to take any missing network feature, complex operational task, or third-party integration and build it natively into Nokia EDA.
Well done!